The Exceedingly Comprehensive Guide to DIY Home Improvement for First-Time Homeowners
How to Repair, Remodel and Renovate Your New Home
There’s nothing quite as satisfying as tearing up an old linoleum floor and laying down some beautiful old growth hardwood in its place, especially when you did it all yourself. But getting to that level of DIY accomplishment requires a lot of time and patience, and a healthy dollop of research.
With our exceedingly comprehensive guide to DIY home improvement for first-time homeowners, we’ll help you learn the skills you need to tackle any DIY home improvement project, from painting a room to maintaining a properly manicured lawn.
Table of Contents:
Painting | Landscaping | Remodeling | Roofing | Flooring | Plumbing | ElectricalTable of Contents:
PaintingLandscaping
Remodeling
Roofing
Flooring
Plumbing
Electrical

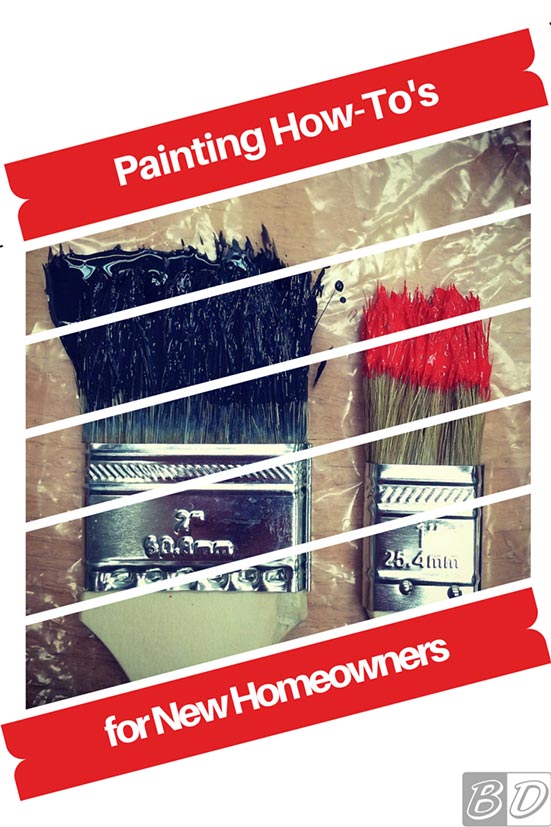
DIY Painting:
I See a Red Door and I Want to Paint it Black
Painting is one of the easier tasks that a first-time homeowner can take on. It doesn't require professional trade skills like electrical or plumbing work, nor does it require specialized tools. However, that doesn’t mean your first brush stroke will equal that of a professional painter. Read along and we’ll show you how to tackle any paint job around the home.
Painting How-To’s:
How to Prep a Room Before Painting
How to Choose the Right Paint Finish
Why You Should Always Use Painter’s Tape
How to Choose the Right Paint Brush
How to Paint Like a Pro
How to Remove Wallpaper
When to Paint Your House
How to Prep a Room Before Painting
There’s a lot of work that should be done before you ever get your paint brush wet. This includes prepping the room that you’ll be painting and prepping the walls themselves. Skipping the room prep is a surefire recipe for drips and splatters—and therefore a surefire recipe for ruined floors, baseboards, ceilings or furniture. Not to mention the work of getting them clean again! Skipping the wall prep can mean your new paint doesn’t adhere to the wall properly, or that imperfection will show through to mar your hard work.
Preparing a room before painting it is essential to make sure the paint stays where it belongs - on the wall.
Step #1: Protect Your Furniture
Remove all furniture from the room or move everything to the center and cover with drop cloths. Also spread drop cloths over the floor.
What the Experts Say...

“This tip seems very straightforward but is often times overlooked by first-time homeowners. Make sure to remove the furniture from the room that is going to be painted. Large pieces of furniture can be left covered in the center of a bigger room but if you are repairing drywall, everything should be removed. There is nothing better than having a beautiful new wall painted that adds vibrancy to your home. Nothing is worse though than having a few paint drops on a piece of furniture. Clear the decks folks!” 
Step #2: Remove Outlet Covers
Remove the plates covering your outlets and switches. Tape the screws to them so you don’t lose them. If you’re painting your ceiling, unscrew the cover plates of any light fixtures and allow them to slide down, then wrap the light fixture in plastic. If you have a fan in the room, you can remove the blades to make covering the fixture easier.
Step #3: Break Out the Painter’s Tape
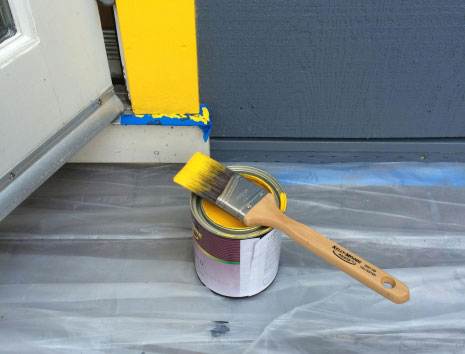
Use painter’s tape to cover any exposed switches. Also apply tape around door handles, along baseboards and molding, around windows and any other room feature that you’ll be painting around.
What the Experts Say...

“You can use foil or saran wrap to mask off door knobs to save a little of that pricey green tape.”
Step #4: Scrape and Spackle
If there is peeling or flaking paint on the wall, use a putty knife to scrape it off. If there are any holes in the wall, use spackle (or a patching kit for large holes) to fix them. Apply primer to any repaired area.
Step #5: Dust and Apply Primer
Dust the walls you intend to paint and scrub them down with a damp rag or sponge.
Apply primer to the walls if:
- You’re painting over bare drywall.
- You’re painting over bare wood.
- You’re using high-gloss paint.
- You’re painting over walls that have been stained or damaged.
- You’re making a drastic color change (for example from a dark color to a pastel).
Once the primer is dried, you can start painting your wall.
Important Note:
If the walls you intend to paint are already painted, you may need to determine whether it was painted with latex or oil-based paint. The reason? You can’t paint over an oil-based paint with latex. So if your intended new color is latex-based and your current paint job is oil based, you’ll need to sand the wall and apply bonding primer before you can add the new coat.
To test your current paint simply dip a cotton swab or cotton ball in rubbing alcohol and rub it over a section of paint. If the paint comes off, it’s latex. If it doesn’t, it’s oil-based.
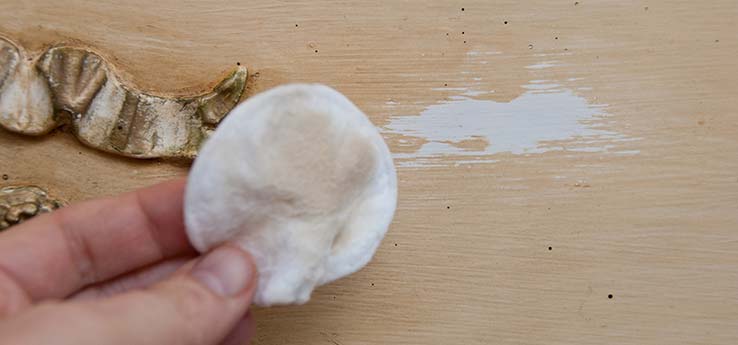
Pro-tip: Do not reuse cotton swabs on face. / Image Courtesy of SalvagedInspirations.com
Choose Another Painting How-To
What the Experts Say...

"A great tip for new DIYers spackling for the first time is using DAP’s Dry Dex Spackle paste. It goes on pink and dries white so you know when it’s ready and is thicker than regular spackle so it needs less coats."
How to Choose the Right Paint Finish
If you think paint is paint, think again. Different paint types work best in different environments in order to achieve different results. Using the wrong paint type for the particular room you want to update or the effect you want to achieve can mean a lot of disappointment with the finished product, not to mention a lot of wasted effort.
To make sure you’re using the right paint for the job, use this list to choose the paint that best matches your project and style:
Flat or Matte Finish
Flat or matte paints have no shine and work very well to mask any problem areas on a wall. They’re best for ceilings and walls with a large number of imperfections. They also work well in bedrooms and areas of the house that don’t see constant use. Flat/matte paints are difficult to clean, so they should NOT be used in kitchens, bathrooms, or any other areas where splashes, spills, and dirt are frequent problems.
Satin Finish
Satin paints have a pearl-like sheen and a silky feel. They’re a good choice for painting over woodwork. Satin paints are also easy to clean, so they’re ideal for kitchens, bathrooms, children’s rooms and any areas where messes are frequent.
Eggshell Finish
Eggshell paints have a slight sheen. They work best in low-traffic areas, like bedrooms. They should NOT be used in high-traffic areas like kitchens or hallways because their finish can easily wear away when brushed against frequently.
Gloss Finish
Gloss paints have a crisp, shiny quality. They are ideal for woodwork (like window frames) trim and moldings. Gloss paints generally shouldn’t be used on walls at all, because their high shine causes even slight imperfections to stand out. Gloss is the most durable type of paint and cleans easily.
Semi-Gloss Finish
Semi-gloss paints are durable like full gloss versions, but have less of a shine. Like gloss, they’re a good choice for woodwork, trim and moldings. They also work well in kitchens, bathrooms and other moist environments, because they stand up very well to humidity. Semi-gloss paints are also easier to clean.
Paint brush? Check. Semi-gloss finish for a burnished image of perfection? Check.
What the Experts Say...

“One of the simplest ways to brighten up any room in your house is to give the walls a fresh coat of paint. Just by adding a fresh coat of paint, and perhaps painting the trim, you will immediately give that space an updated look for a small investment.”
Choose Another Painting How-To
Why You Should Always Use Painter’s Tape
Painter’s tape can be pricey for something you may only use once, so many budget-conscious first-time homeowners opt to use regular old masking tape instead. The sole advantage of using masking tape is that it’s generally cheaper than professional painter’s tape. Unfortunately, masking tape isn’t made to stand up to paint, and so there are a slew of disadvantages to using it for your paint job.
Coloring inside the lines is actually a really good thing.
Masking tape is great for protecting the glass while you paint window frames since it will peel off cleanly, but aside from that, masking tape can often make a mess of your paint job. You really want to avoid using masking tape for the following reasons:
- On walls and baseboards, masking tape will leave behind a sticky residue that’s difficult to clean up.
- Because masking tape isn’t designed for painting, paint drips can stick to the surface and cause your new paint job to peel when you pull the tape up.
- Paint drips can eat through masking tape or cause it to pucker, allowing paint to seep onto the surface you were trying to protect.
- Finally, masking tape needs to be removed almost immediately to prevent it from damaging the surface it’s supposed to protect or leaving severe residue.
If you need to use tape for your paint job, painter’s tape is always your best bet. It’s built to stand up to paint, so it won’t degrade or pucker, ensuring clean lines and protected surfaces. It also won’t leave behind residue, and will still pull off cleanly even if left up for several days.
What the Experts Say...
"Green Frog Tape is the only tape I use when I need to make a super straight line. Yellow Frog Tape is great over an existing painted wall as it’s delicate and won’t take the paint off when removed."
Choose Another Painting How-To
How to Choose the Right Paint Brush (and Paint)
To ensure that you’re using the right materials for the job, take a look at this list to find the supplies that best fit your particular DIY painting project.
Where to Use a Brush:
Brushes are designed for small areas where precision is needed. Use brushes to paint edges and corners when painting a wall, and to paint elements like trim. Brushes with an angled edge are especially good for corners and other cut-in areas.
Types of Brushes to Consider:
Natural Fiber Brushes:
Natural fiber brushes should be used with oil-based paints. Natural fibers will soak up the water in latex-based paints, causing them to lose their shape and stiffness. This in turn makes it next to impossible to use them effectively.
Synthetic Fiber Brushes:
Synthetic fiber brushes should be used with latex based paints. Because they’re made to be resilient and multi-purpose, synthetic brushes can also be used with oil-based paints.
Where to Use a Roller:
Rollers are designed to apply a large amount of paint quickly. Use rollers to paint large areas with no obstructions, like walls and ceilings.
Types of Rollers to Consider:
Foam Rollers:
Foam rollers are used to cover an area with an even layer of paint. They should be used on smooth, flat surfaces.
Plush Rollers:
Plush rollers soak up and apply a thicker, less uniform layer of paint. They should be used on textured surfaces.

Personally, we'd use fewer wildly different colors, but you do you.
Types of Paint:
Oil Based Paints
Pros:
- Oil based paints are your best bet if you live somewhere with a dry, warm climate.
- They are also your best choice for high-traffic areas and for painting over wood.
- Oil paints dry slowly, which allows you more working time.
- They also provide more coverage with one coat than latex based paint.
Cons:
- Oil based paints are hazardous to the environment and must be disposed of according to local household hazardous waste guidelines.
- Oil paints also produce fumes that can become overwhelming in small areas.
Latex Based Paints
Pros:
- Latex based paints are your best bet if you live somewhere with a humid environment or with frequent weather fluctuations.
- Because latex paint is fast-drying, it’s also a good choice when you’re on a limited time budget.
- With a latex based paint, you can do multiple coats in one day.
- Latex paints are also environmentally friendly and don’t need to be handled as carefully as oil based paints.
Cons:
- Latex paints cause wood surfaces to swell, necessitating sanding between coats.
What the Experts Say...
"Some great tips and tools: Invest in a handy bucket which has a magnet inside to hold your brush when not in use. Purchase multiple sized angle-tipped brushes. A 2 ½ inch one for cutting in, a 1 ½ inch for window and door trim & 1 inch for hard to reach or tight spots."
Choose Another Painting How-To
How to Paint Like a Pro
Painting a room isn’t a difficult project to take on, but when you dive in without first understanding proper technique, you’ll end up with a sloppy-looking paint job. The key to a crisp, professional looking paint job is to work quickly. When you work too slowly, or take a break in the middle of your work, you allow the paint you’ve already rolled on to begin to dry, creating a stark contrast in color.
To find the right cadence, follow the steps below and you’ll be painting like a pro in no time:

Unless you're Jackson Pollock, you'll probably want to stick with the traditional painting route.
Step #1: Create a Plan of Attack
Before you begin painting, make a plan of attack. Decide who will be painting where, position paint buckets or trays where they’re easily accessible to everyone, and make sure you’ve got time to finish the first coat without interruption.
Step #2: Brushes Along Baseboards, Rollers on Walls
Use brushes to paint along baseboards and the edges of the walls. Then use long-handled rollers to paint with sweeping strokes, beginning as close to the baseboards as you can get and extending at a slight angle as close to the ceiling as you can get.
Always use a light touch—pressing hard on your roller isn’t necessary and will actually slow you down.

Remember: only go without painter's tape if you know you've got a very steady hand. / Image Courtesy of Calvert Painting
What the Experts Say...
“When cutting in, make sure to feather the paint out from the trim/baseboard up to about 3 inches. This will prevent ‘picture framing’ around your windows and doors.”
Step #3: Roll Over & Repeat
To avoid ridges, smooth out the paint you just applied by running your roller back over it without refilling it with more paint. Don’t apply pressure. Once you’ve smoothed back over, refill your roller and repeat the process. Don’t begin painting too close to a corner and hold your roller so that the open side points toward the corner. This will ensure that you have enough room and maneuverability to smooth back over your work without messing anything else up.
Step #4: Lookout for Lumps
Be on the lookout for lumps in the paint caused by your roller picking up bits of dried paint from the bucket, or bits of other debris like hair. Keep a damp rag on hand so that if you come across lumps, you can quickly clean them up while the paint is still wet and can be easily touched up.
Step #5: Watching Paint Dry
Follow the directions on your paint can in regards to drying time between coats. Generally, you’re good to go on a second coat when the first coat is dry to the touch. However, when in doubt, add a few hours to the wait time to make extra sure the current coat is dry enough to continue.
Top Tips for New Homeowners:

"While moving day can be filled with excitement and ideas for that new space, there are a number of things that new homeowners really need to make a priority beyond what color to paint the kitchen!
#1 - Locate the utility shut offs - circuit breaker box, gas line and water shut offs. Look in basement, garage or utility closets.
#2 - Turn the water main off and back on to make sure the valve is not rusted in place. You will need to turn it off in case of leak.
#3 - Review a fire exit plan with your family. Consider plan for babies, toddlers and pets.
#4 - Change the locks. Secure a spare key in a safe, inconspicuous place outdoors.
#5 - Change the toilet seats. Just because you deserve a fresh throne!"
Choose Another Painting How-To
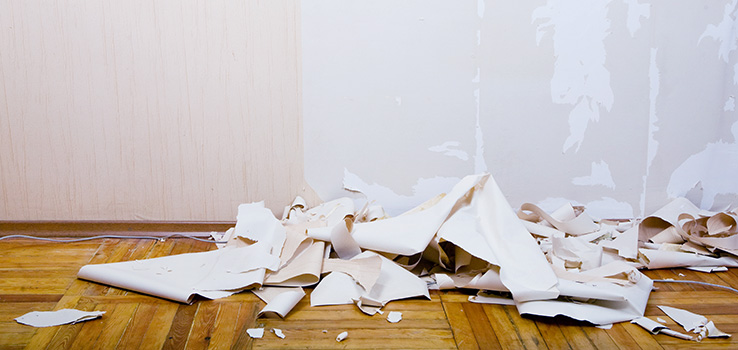
How to Remove Wallpaper
It’s guaranteed that wallpaper will eventually begin to sag. Sagging in one section of a wall can be repaired by cutting the section out, using drywall compound to make it level with the rest of the wall, and then repainting it. But because wallpaper sagging is progressive, you’ll find yourself having to repeat this process over and over again for years.

Removing wallpaper is easier than it looks, though fun it isn't.
If you reach the point where you decide it’s better to just remove the wallpaper, here’s how you should go about doing it:
Step #1: Take Everything Down
Take down picture frames, posters and everything else on the wall. Any other trinkets or baubles should be taken off shelves to avoid knocking them over while you're tearing through the wallpaper.
Step #2: Clear Out Your Furniture
Remove as much furniture from the room as possible so you have space to move around. Whatever furniture can’t be moved be sure to cover up to keep dust and plaster off of it.
Step #3: Towel Up
Grab some towels and place them along the baseboards, then cover with plastic drop cloths and tape to the baseboards. This will help keep your floor relatively clean while the wallpaper scraps are flying.
Step #4: Determine the Type of Wallpaper
Some types of wallpaper are easier to remove than others. To figure out what kind you have, start peeling at a corner or seam near the bottom of the wall. If the wallpaper pulls away easily, and keeps peeling as you move up, then your wallpaper should be strippable.
Step #5: Start Stripping
Once you’ve started pulling the wallpaper off the wall, you should be able to move swiftly around the room. The key to removing strippable wallpaper is to get a corner or seam started, and then slowly pull it up the wall using both hands. If the paper proves difficult, use a razor blade and cut horizontal strips into the paper to score it. Then pull the paper loose and continue to pull upwards as normal.
Important Note:
Other types of wallpaper may be more difficult to remove. This includes washable wallpaper, as well as wallpaper that has been painted over.
With washable wallpaper, you will need to use a scoring tool to punch holes in the plastic film layer. Then, use a spray bottle to spray water into the score marks until the wallpaper beneath is saturated, usually waiting about 10 minutes. After that you can start removing the wallpaper with a putty knife.
For wallpaper that has been painted over, you will either need to score the wallpaper, using the same method above, or rent a steamer to loosen up the paint and wallpaper layers.
Removing wallpaper can also be a good stress-reliever.
Choose Another Painting How-To
When to Paint Your House
When you’re painting the outside of your house, it’s essential that you pay attention to weather conditions. And not just the obvious stuff, like rain. Inside, you have control over the temperature and humidity over a room, but outside you have to respect Mother Nature’s whims.
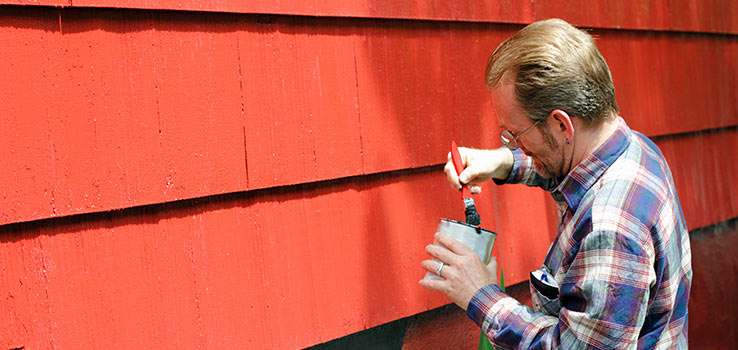
Giving your house a paint makeover requires equal parts meteorology and patience.
Follow the painting tips below to learn the best time to paint your house:
- The ideal weather for exterior painting is an overcast day with a light breeze, provided that the forecast isn’t calling for rain. This ensures that there won’t be too much moisture in the air for your paint to thoroughly adhere to your walls.
- Avoid painting in hot weather. It will cause the paint to dry too quickly, which can cause visible differences between sections.
- Windy days can also cause the paint to dry too quickly. You also want to make sure you don’t make the mistake of painting when it’s too humid for paint to adhere properly.
Of course, it’s not always possible to wait on the ideal weather. But even when an overcast, breezy day isn’t in the cards, you can still take steps to ensure your paint job goes smoothly:
- An easy way to test if there’s too much humidity in the air is to swipe a thin coat of water over a spot on your home’s exterior. If it hasn’t evaporated within 15 minutes, the air is too humid for paint to adhere.
- You can wait a few hours and repeat the test to see if the humidity has fluctuated enough to allow painting.
- If the day is very windy, wait until tomorrow. Ditto if the temperature is above 80 degrees.
Bottom Line:
Find the best day possible, follow the instructions on your paint can in regards to drying times, and your DIY paint job should turn out just fine.
“Does the front of your house need a makeover? We suggest painting the door a new color and switching out the old hardware for new hardware. Take a step further by adding window boxes to your windows.”

A little ambitious, but we believe in you. / Image Courtesy of Fotogwal
Choose Another Painting How-To
Want a Dumpster Today?
Click to Call for Pricing
- Save money with our affordable flat-rate prices.
- Rent small and large dumpster sizes for all types of projects.
- Need it fast? We offer quick delivery.
.jpg)
DIY Landscaping:
Where the Grass is Sometimes Greener
Landscaping; the one area of your property where it’s okay to have some dirt lying around. DIY landscaping is one of those areas of home improvement that we all strive to be greater at, if only so we can show off our lush green lawns to all the neighbors. With these tips and tricks, you’ll be growing a green thumb in no time; and not just because you neglected to go to the doctor after stapling your glove to your thumb.
Landscaping How-To’s:
How to Find the Slope of Your Yard
How to Design Your Landscape
Where You Should Plant Trees in Your Yard
How Short You Should Cut Your Grass (Without Killing It)
How to Fertilize Your Lawn
How Often You Should Water Your Lawn
How to Find the Slope of Your Yard
When it comes to landscaping, it’s all about dat slope. If your yard isn’t steep enough you can end up with some chronic flooding problems, both on the lawn and in your basement. That’s because rainwater needs a sufficiently steep slope for it to flow downhill and drain away into local creeks, rivers, and storm drains. If there isn’t sufficient slope, the water will just accumulate on your property, potentially damaging your home and yard. And feelings.

Dat slope is what keeps your basement dry and your yard navigable.
It might have been a while since you’ve had any landscaping work done on your home. If that’s the case, then you’ll want to measure out the slope around your home to see if there is sufficient drainage. To do so, simply gather these items together:
- A hammer.
- 10-12 feet of string.
- A line level.
- A tape measure.
- Two wooden stakes.
The rule of thumb is to have a slope that runs 6 inches downhill over the first 10 feet. To tell where your current slope lies, follow these steps:
Step #1: Stake Your Claim
Stick one stake on one side of your home, then place the second stake directly 10 feet away.
Step #2: Tie Up the String
Tie one end of the string around the first stake at ground level and the other end around the second stake.
Step #3: Line Up the Level
Make sure the line is nice and taut, then place the line level in the center of the string.
Step #4: Align and Measure
You can now move the string up or down on the second stake until the line level shows that the string is completely level. Use your tape measure to figure out how high up the string comes on the second stake; this will tell you how high your slope is.
Step #5: Rinse & Repeat
Repeat this process on each side of your house until you know the exact slope of your property in each direction. If the slope is below six inches on any side, consider calling a landscaper to move some of the soil around to correct it. This will help prevent any future basement flooding or large puddles from forming in your yard.
What the Experts Say...

“In addition to checking the slope, it’s important to keep a minimum 12-inch distance between your home and any landscaping. Having plants located too close to the perimeter of a home can create a damming effect, causing water to pond and leading to possible flooding or foundation damage.”
Choose Another Landscaping How-To
How to Design Your Landscape
So you’ve finally planted your prized begonias and canterbury bells in the flower bed; their bright, beautiful colors attracting the eye of every passerby. Yet within a week they’ve been trampled underfoot by the kids as they run, chase and trip around the front yard. What is any self-respecting gardener to do to keep their flowers flowering?

A functional landscape is one that works for you and your family.
Every yard should reflect the needs of you and your family, as well as future projects that might necessitate heavy equipment. Here are a few landscaping design tips for you to follow when DIYing your backyard:
- If you have kids or pets, you should make sure that flower beds and other ornamentation are kept away from common footpaths so they don’t step over them every time they play outside.
- Leave space around the outside of the house, as well as the entrance to your yard, so that you can roll in heavy equipment for those “down-the-road” home improvement projects.
- Keep certain landscaping elements, like hammocks or play structures in a central location away from delicate arrangements. That way all the ruckus and roughhousing is confined to one specific area of the yard.
- Formal landscapes with symmetrical arrangements are expensive to maintain due to the difficulty of finding identical plants to replace the ones that die. Instead, focus on asymmetric designs that don’t rely on having two identical shrubs or trees planted opposite each other.
Choose Another Landscapinging How-To
Where You Should Plant Trees in Your Yard
Planning ahead can be tricky, especially if you are planting little trees that will eventually sprout into 60-foot-tall monstrosities that blot out the sun. Besides that, if you end up planting your trees too close to the home you run the risk of having your foundation cracked as the tree’s roots grow and expand over time. Here are a few quick tips to follow when planting trees in your yard:
Keep your friends close, but your trees a good 35 feet away.
- If planting trees that will grow to 60 feet or higher, make sure that they are at least 35 feet away from your home. This will give their roots room enough to grow without damaging the foundation of your home.
- Take note of fire hydrants and utility poles, generally keeping 15 feet away from either.
- Call your local utility companies and have them mark where your gas, electric, and sewer line is so you don’t accidentally rupture something important!
Choose Another Landscaping How-To
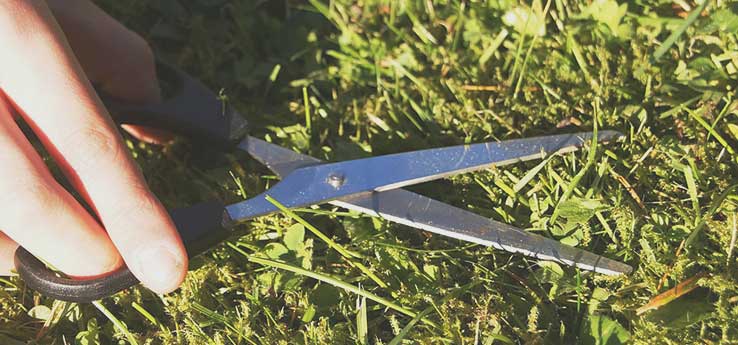
How Short You Should Cut Your Grass (Without Killing It)
Cutting grass is simple enough, but it takes a little know-how to ensure your lawn is as perky as a wallflower. And now that you are a homeowner, it’s on you to make sure the lawn is in good shape, and that all starts with knowing how short to cut your grass.
It might be tempting to fire up the rider mower and run roughshod over your grass, but a Rambo-style assault on your Kentucky bluegrass could end up leaving your lawn parched, cracked and drained of color.
To avoid that fate, here are a few tips to keep in mind when cutting your grass:
“Drill Sergeant gave me a pair of scissors and told me to cut the grass…”
Lawn Care Tips:
- For most of the year, cutting your grass between 2 ½ and 3 inches in height is sufficient to keep your lawn looking green and healthy.
- During the summer, you will want to up your mowing game to 3-3 ½ inches. Keeping your grass tall in the summer will keep more moisture in the soil and provide protection from the sweltering heat.
- Keeping a good height on your grass will also help it survive through drought seasons, since taller blades of grass will grow deeper roots.
What the Experts Say...

“Give your soil some love: Do you know your soil? To achieve healthy plants you need to have healthy, living soil. Just like people, soil needs to be able to drink, breathe, eat and digest its food.
Befriend your weeds: Weeds tell us the condition of the soil below. It’s easy to kill the messenger but the weeds will always grow back unless the soil conditions below change.
Seeding or Weed Control: In the spring, you have to choose between weed control and lawn seeding. Pre-emergent herbicides prevent grass seed from sprouting too, so you can’t do both.”
Choose Another Landscaping How-To
How to Fertilize Your Lawn
Fertilizer can mean the difference between having a barren wasteland or a tropical paradise in your backyard. That simple blend of nitrogen, phosphorus, and potassium is all it takes to nourish your soil and create a lush lawn. But fertilizing your lawn requires a light touch. Give it too much and you’ll end up burning parts of your lawn, too little and your grass will die of malnutrition. Follow these simple steps when fertilizing and your grass will be as lush as the Amazon:
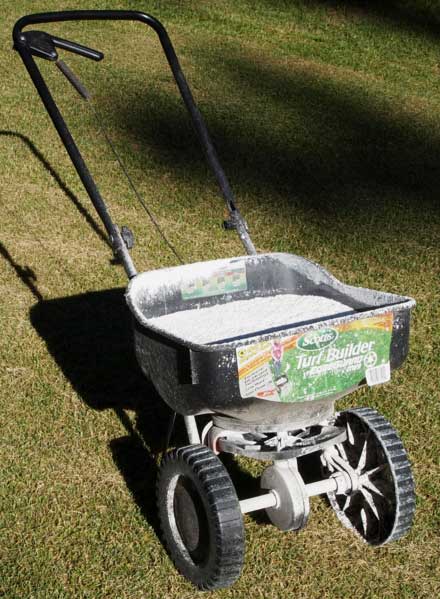
With any type of fertilizer cart, you want to overlap your passes so you can get an even spread. / Image Courtesy of FatCatsAreHappyCats
First You’ll Need:
- A drop/broadcast spreader (which you can rent, rather than buy.
- A bag of fertilizer.
Step #1: Set the Spreader Settings
Adjust the settings on your spreader to match the area you want to fertilize. Specific filling instructions should appear on the fertilizer bag or on the spreader itself, dictating how much fertilizer you need for the specific size of your lawn.
Step #2: Load it Up
Load up your drop or broadcast spreader with your fertilizer pellets over a hard surface. This will allow you to clean up any stray pellets so you don’t end up with a large burn spot on your lawn.
Step #3: Start Around the Edges
Whether your lawn is oval or rectangular, you should always start with the edges first and then work your way towards the middle in overlapping rows. Maintain a normal walking speed throughout the process.
Step #4: Water the Lawn
After you’ve spread the fertilizer, water the lawn to get the nutrients into the soil. This will prevent the granules from washing away in the rain, as well as prevent the leaves from burning.
Step #5: Clean Up
Spray down the spreader while it’s on the grass to remove any remaining fertilizer. This will keep it from corroding. Let the spreader dry thoroughly before storing.
Important Note:
For DIY landscapers, the best advice is to use granule fertilizers instead of liquid sprays. Granules are a no-fuss way to distribute fertilizer since you don’t need special equipment to spread it around. Liquid fertilizers are best left to the professionals who have both the expertise and the gear necessary to ensure an even coating across an entire yard.
What the Experts Say...

“The established lawn will need a feeding of fertilizer, such as Earl May Lawn Food, at least twice a year – in early spring and again in the fall for healthy, vigorous growth. For best results, consider our lawn programs designed with specific products to be applied from spring through fall. Your lawn's resistance to disease, insect attacks, drought and weeds, depends largely on the way you feed it. Plant food is continually lost from the soil and must be replaced.”
Choose Another Landscaping How-To
How Often You Should Water Your Lawn
It can be tempting to run the sprinklers every other day, especially when its 90 degrees and rising. But if you keep it up long enough you’ll end up with a spongy lawn and puddles of water dotting your property. Here’s what you need to know to avoid turning your lawn into a pond:
Tip #1: Know Your Grass
- If you live in a winter-prone part of the country, you most likely have a variety of cool-season grass which requires watering every 4 to 5 days.
- Other grasses adapted for warmer climates need a scant ½ inch to ¾ inch of water every 1-3 weeks, depending on the prevailing weather conditions. You always want to keep your soil moist, but not so much that it puddles.
Tip #2: Know the Signs of Dehydration
The most common signs of under-watered grass include:
- Blueish-green color.
- Curling blades.
- Footprints that remain noticeable.
Tip #3: Pick the Right Time of Day
- The best time to water the lawn is in the morning as you’ll lose the least amount of water to evaporation and wind drift.
- Watch out for fungi or mold if you plan on watering during the day as spores thrive in warm, moist environments.
What the Experts Say...
“Upgrade your sprinklers: How much water does your lawn need? Most lawns require about an inch of water per week during the growing season. However, most areas of the nation don't receive near that much naturally and/or municipalities have restrictions on how much you can apply. Give your sprinklers a tune up and make sure you’re getting the most out of every drop.”
Choose Another Landscaping How-To
Yard Waste Disposal Tips:
- Some cities permit residents to burn yard waste in their backyards, with permission of course. This can be a quick way to deal with a small amount of branches or bushes.
- Another option is to start a backyard compost pile that can turn your old leaves, bushes, and tree branches into a rich soil amendment. However, the composting process can take a while and does come with a bit of learning curve.
- For larger amounts of landscaping debris, we recommend renting a yard waste dumpster. With a dumpster you can get rid of tons of yard debris in one go without having to spend an afternoon tending a fire or waiting several weeks for your branches to turn to compost.
Want a Dumpster Today?
Click to Call for Pricing
- Save money with our affordable flat-rate prices.
- Small and large dumpster sizes for all types of projects.
- Need it fast? We deliver your dumpster quickly.


DIY Remodeling:
We Built This House on Rock and Roll
Unless you’re embarking on something extremely ambitious, like building an entirely new addition or removing a load-bearing wall, there are many remodeling projects that are totally within the realm of possibility for a DIY remodeler. However, it’s important to do some research beforehand to ensure you know what you are doing.
Simply follow these remodeling how-to’s and you’ll be able to remodel your home without turning your prized Victorian into a shanty.
Remodeling How-To’s:
How to Choose the Right Windows, Tile and Drywall
How to Hang Something Heavy
How to Frame a Wall
How to Hang Drywall
How to Choose a Contractor
How to Curb Your DIY Enthusiasm
How to Choose the Right Windows, Tile and Drywall
Many people, especially first-time homeowners, choose to DIY their remodeling to save money. But sometimes the desire to save money can get you stuck with shoddy materials, a problem that leads straight to Wholelottawastedworkville. With certain materials, opting for the budget versions will end up costing you more money down the road when they wear out or break.
Here’s how you can make sure you’re choosing the right windows, tile and drywall for your home remodel:
Tips for Choosing the Right Window Frames
You probably think a window is a window, with the only difference being single pane vs. double pane. But it’s not just the glass you need to consider when you purchase new windows:
- If the window frame is flimsy or otherwise cheaply constructed, your windows will have a much shorter life before they begin to warp.
- Flimsy window frames also won’t insulate your home as well as they should, leading to higher energy costs.
- The worst culprits are vinyl frames that aren’t reinforced with any other material. Choose wood, metal or reinforced vinyl to ensure a long life for your new windows.
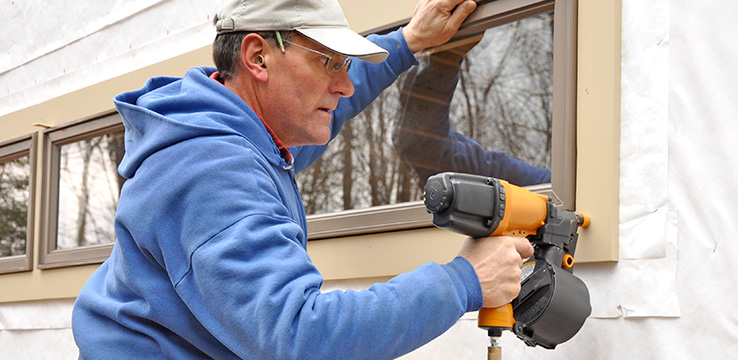
Quality windows look professional, keep your heating costs low and last a lot longer.
Tips for Choosing the Right Tile
- Good tile should last decades without showing significant wear the way soft flooring would.
- Cheap tiles are far more prone to cracking or staining. Whether you opt for ceramic or porcelain tiles, choose a mid to high-end option. You’ll be paying more now to ensure that you won’t have to pay anything else to maintain that floor for years, if not decades.
Save your mother's back: buy quality tile.
Tips for Choosing the Right Drywall
- Cheap drywall may have been produced using recycled scrap drywall from China, which is held to lower safety standards than U.S.-made versions. Over time, it can corrode the pipes inside your walls and even cause health issues for homeowners.
- Cheap U.S.-made drywall has also been accused of causing health problems, including breathing issues, headaches and nosebleeds.
- To protect your pipes of both the plumbing and breathing persuasions, look for U.S.-made drywall that wasn’t produced entirely from synthetic, also called FDG, gypsum (nearly all drywall contains some amount of synthetic gypsum, but small quantities aren’t harmful).
- Avoid drywall labelled as “green board,” which has been treated with high levels of potentially toxic chemicals.

When it comes to drywall, you don't want to go green.
What the Experts Say...
“In choosing any materials – ranging from faucets to fascia boards – it’s always best to look for middle-of-the-road pricing. In my experience, the highest-priced items aren’t worth it, and the lowest-priced items won’t deliver the best result. Staying in the middle range will always serve you well in home improvement decisions.”
Choose Another Remodeling How-To
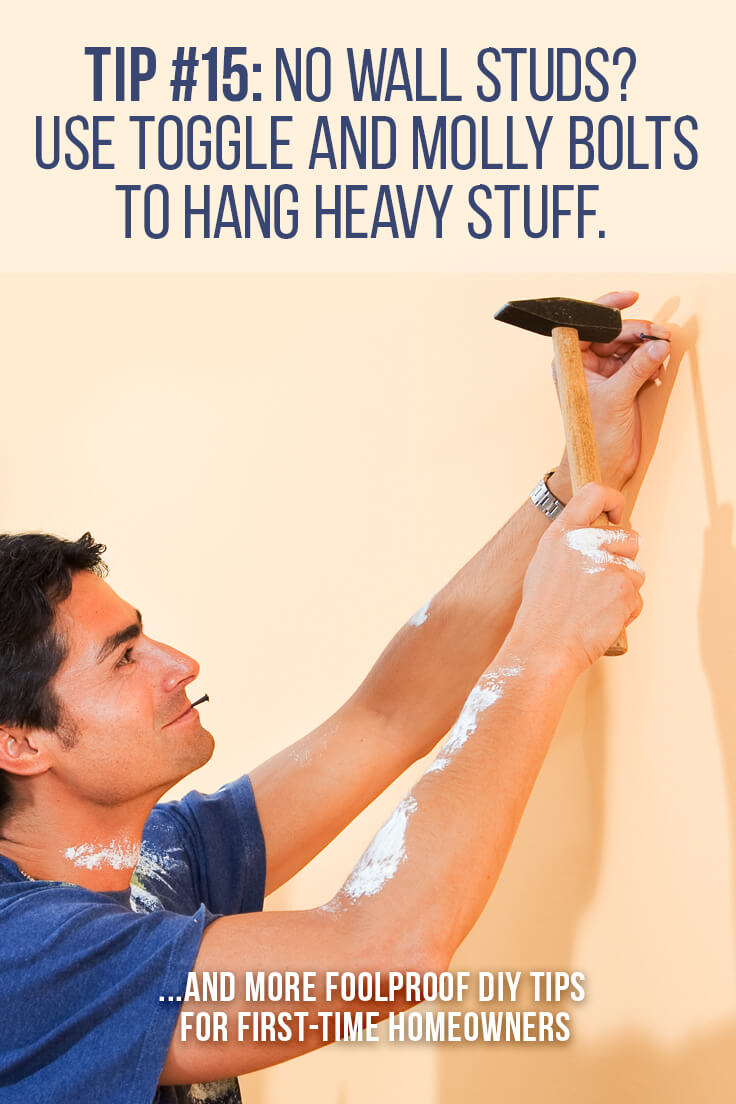
How to Hang Something Heavy
So, you’ve finally decided to hang up those shelves you bought months ago and then left in your trunk. You’re all set to start enjoying your newly organized room as you place the last item on the last shelf—only for all your hard work to come crashing down.
You can get away with hanging pictures willy-nilly, but anything heavier than that: ceremonial sabers, shelving, taxidermied animal heads and so on, needs to be nailed into a stud. Otherwise, the nail isn’t actually fixed to anything and won’t be able to support the object’s weight. You can always use an electronic stud finder, but if you don’t have one on hand and aren’t interested in purchasing one, here’s our low-tech stud-finding method:
Step #1: X Marks the Spot
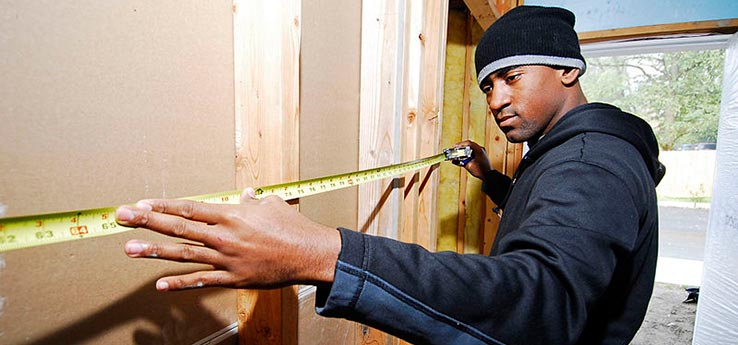
Mark the general spot on the wall where you want to hang something. Starting at the end of the wall, use a measuring tape to mark 16 inches from the corner.
Step #2: Start Knocking Around
Now, knock on the wall at that spot. If you hear a solid (as opposed to a hollow) sound, you’ve found a stud!
Step #3: Keep Measuring
Now all you need to do is continue measuring in 16 inch increments until you reach the stud closest to where you planned to hang your item.
Important Note:
If you don’t hear a solid sound at your 16-inch mark, don’t despair. 16-inch spacing is currently the standard stud spacing, but if your home is older, the studs are likely spaced according to an older standard. Return to the end of the wall and make a mark at 12 and 24 inches from the corner. Knock on each of those spots. Wherever you hear the solid sound, complete the above process using that increment.
Step #4: Attach Your Anchor
Once you’ve found the stud closest to your X, you can nail/screw/bolt your hook or other anchor to the wall. This will ensure your antique cavalry saber mirror is securely fastened to the wall, rather than lying in a heap beneath it.
How to Hang Something Without a Stud:
Sometimes, there simply isn’t a stud where you need one. In that case, there are some heavy-duty fasteners you can use to hang something heavy directly onto your drywall:
Molly Bolts:
These bolts are designed to provide a permanent fastening point, and when we say permanent, we mean permanent. Molly bolts are built with teeth that dig into the drywall, as well as legs that attach themselves on the inside of the wall.
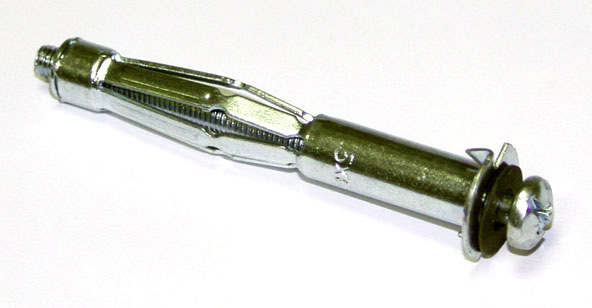
Molly bolts: the answer to most of life's problems.
How to Install Molly Bolts:
1. Drill a pilot hole into the wall corresponding the size of the bolt.
2. Insert the molly bolt and gently tap it into the wall.
3. Use a screwdriver to tighten the screw inside the bolt, raising the legs and securing the bolt in place.
4. You can hang items up to 50 lbs. in weight using a single molly bolt.
Toggle Bolts:
Toggle bolts are so hardcore you can use them to install ceiling fixtures. Each bolt contains a pair of spring-loaded wings that dig into the inside of the wall, much like molly bolts, the difference being that toggle bolts are designed to hold more weight.
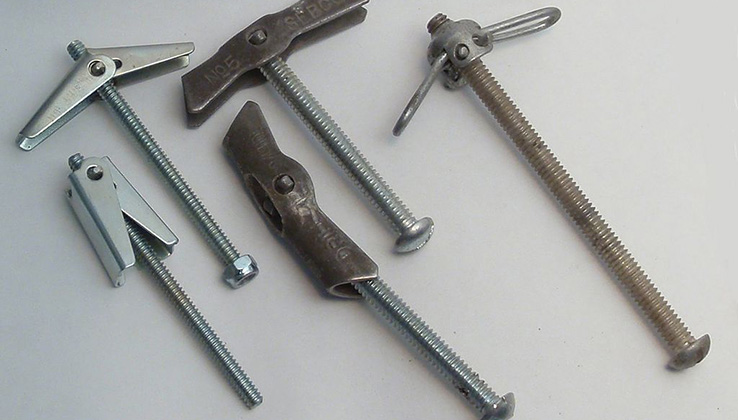
Toggle bolts: the answer to all of life's problems.
How to Install Toggle Bolts:
1. Drill a pilot hole into the wall corresponding to the size of the bolt.
2. Insert the screw through the object you wish to hang and into your pilot hole.
3. Now screw the toggle partway onto the screw.
4. Push the toggle into the hole until you hear the wings expand.
5. Put pressure on the toggle as you tighten the screw. This will keep the wings from turning inside the wall.
6. Your toggle bolt is now ready to hold up pretty much anything.

Many hands make light work of hanging heavy items.
Choose Another Remodeling How-To
How to Frame a Wall
Whether you simply want to partition off a portion of a room or are planning something a bit more ambitious, like building a walk-in closet, constructing non-load bearing walls is a relatively simple process. Essentially, you’re just building a square frame that you’ll line with studs and then cover with drywall. But the process can be a bit unfamiliar for a first-time homeowner going the DIY route.
Follow these steps below to learn how to frame a wall:
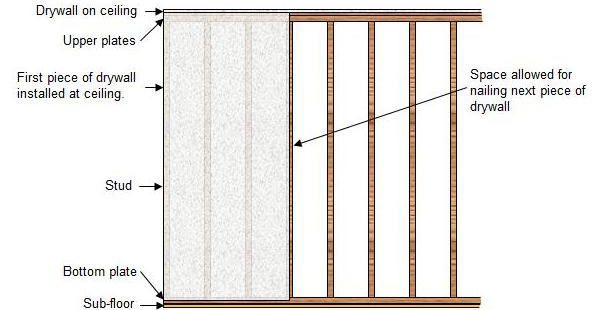
Older homes may have been built with different dimensions, but 16-inches on center is the current standard.
Step #1: Get the Spacing Right
It’s essential that wall studs be positioned “16 inches on center,” meaning that the center of each stud is spaced 16 inches away from the center of the next stud. It’s important to get this spacing right because drywall, cabinetry and other building materials are made to fit this framework.
Step #2: Build Your Header and Footer Plates
Cut two 2X4s to the length of the wall you intend to construct. These will be the header and footer plates you’ll nail your studs to. Lay out your plates, one above the other and stretch a tape measure across their full length.
Step #3: Mark Up Your Boards
Most tape measures have red markings indicating where studs should be placed when framing a wall. Wherever you see these marks, use a permanent marker to make an X 3/4 inches back from the mark, on both boards.
Step #4: Grab a Framing Square
Once you have marked the full length of each board, place the thin side of a framing square over the first X on both boards and draw a line across both boards on either side of the framing square. Repeat for all of your X’s. The thin side of a framing square is the same width as a stud, so when it comes time to nail in your studs, they will slot right into these lines, giving you a wall framed perfectly 16 inches on center.

This method is perfect for beginners. If you’re working with someone who’s framed walls before, they may frame differently.
What the Experts Say...

“Keep digital records of the product warranties, owner’s manuals and maintenance guidelines for all the new building materials, fixtures, finishes, and equipment you have installed as part of your project. This will help you properly maintain these items, and if something is faulty, you could get it replaced as long as it is within the warranty period.”
Choose Another Remodeling How-To
How to Hang Drywall
On the surface, hanging drywall is a pretty straightforward task. The difficulty comes in deciding whether to hang your drywall sheets vertically or horizontally. Many DIYers choose to hang them vertically because it tends to be easier to handle the sheets this way. It also leaves a smaller gap between each sheet which tends to make plastering simpler and faster. While those may sound like great advantages, professionals agree that hanging drywall vertically will ultimately make your job harder and lower the quality of the finished product.
Vertical drywall: Mo' seams, Mo' problems. / Image Courtesy of Renovation Headquarters
Aside from a few exceptions, you should hang drywall horizontally. Doing so greatly minimizes the number of seams you’ll need to plaster, which in turn minimizes the room for mistakes that will lead to a blemished wall.
Here’s how to hang drywall the right way:
Step #1: Measure & Trim
Measure to be sure that the end of each drywall sheet will fall on the middle of a stud. Trim wherever necessary.
Step #2: Cutout Space for Outlets & Fixtures
Measure the distance between studs and any electrical outlets or other elements that are part of the wall you’re covering. Transfer those measurements to the appropriate drywall sheet and use a keyhole saw to make cutouts to allow the drywall to fit over the item(s) in question.
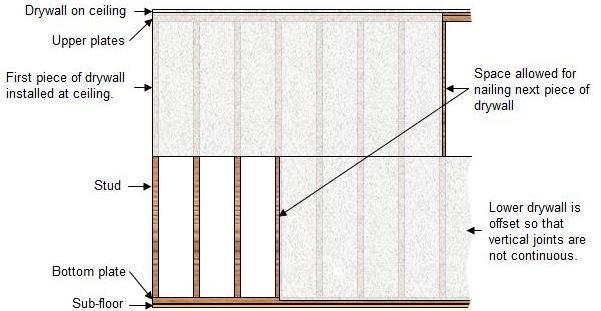
Fewer seams, fewer sheets, more dollars in your pocket. / Image Courtesy of Renovation Headquarters
Step #3: Attach the Drywall to the Studs
Apply adhesive (if desired) to the studs you’ll be fixing your first drywall sheet to. Have helpers apply the sheet to the studs. Use screws to affix the sheet to the studs on either end. Space screws 12-16 inches apart, and sink each screw just below the surface of the drywall.
Step #4: Break Out the Drywall Mud
When the wall is covered, apply drywall mud to the screw heads and the seams between sheets, using a mud knife. Drag you knife along the seams until they are completely filled.
Step #5: Finishing Touches
Before the mud is dry, apply drywall tape to the seams. Smooth the tape out with your mud knife, and then cover with more mud. Wait a day for everything to dry, and then repeat the entire mudding process. Your walls are now ready to be painted or wallpapered.
What the Experts Say...
“Update your insurance policy after large scale remodels because if your house is destroyed by fire or natural disaster, the cost to rebuild your home is greater because of all your home improvement projects.”
Choose Another Remodeling How-To
How to Choose a Contractor
Even though you are a determined DIYer, your home remodel will probably require syncing up with a professional contractor or two in order to find the right cabinets, flooring, fixtures and overall theme of your remodel. But finding the right contractor for your project can be a challenge, especially if you aren’t sure where to start.
Here are a few tips to follow when choosing a contractor:
Contractors are an invaluable part of the home renovation process, so long as you find the right ones.
Tip #1: Word of Mouth
Friends and family are generally the best place to start for referrals to reputable contractors. You can then use the National Association of the Remodeling Industry’s website to find contractors near you who are members. Start assembling a list of certified contractors that you can then follow up with to assess how qualified they are for the level of work your remodel requires.
What the Experts Say...

“Choosing a competent, ethical contractor requires a thorough background check that goes beyond the typical advice of checking their license status with regulatory agencies and referral list. People do this and still get in trouble. You’ve got to look at lawsuit and lien history and credit checks to name a few. Google the company name to see if there are any online complaints.”
Tip #2: Interviews
Start calling the contractors on your list and inquire about:
- Previous projects.
- General area of expertise.
- Current projects.
- Previous clients.
- Financial references, including banks and suppliers.
These interviews should help narrow the field down to a handful of potential candidates based on their overall reputation, quality of work and previous projects that align with your remodel.
Tip #3: Check Their Work
Call up previous clients and ask to take a look at the finished results to see if their work meshes with your ideas. Also check out any current work sites of theirs to see how the contractor manages their projects. Things to look for are safety considerations and how clean the site is, especially if the homeowner is living in the home while the work is being carried out.
What the Experts Say...
“Detailed written agreements are a must! Everything you expect to have happen must be in writing down to the nitty gritty details of description, makes, models, colors, etc. Don’t rely on “verbal agreements” as those rarely make it into the agreement and suddenly you’ve got a "Change Order" for "Extra Work". This is where costs start to escalate.”
Choose Another Remodeling How-To
How to Curb Your DIY Enthusiasm
There’s a reason there are professionals out there who do this all day, every day. You may very well be an expert in a certain area of DIY, but remodeling is one of those areas where achieving expert-level proficiency is pretty difficult and where overestimating your abilities can cause serious—and costly—damage to your home. Not to mention put you, your helpers and your family at risk of serious injury.
The key to curbing your own hubris is research, research and research. Look up videos and step-by-step guides (such as The Exceedingly Comprehensive Guide to DIY Home Improvement for First-Time Homeowners) for the project you’re considering taking on. Watch and read until you have a good grasp of everything the project entails. Then ask yourself:
- Do I have experience with this general category of DIY work?
- Do I understand everything I’m being told to do when I look up tutorials?
- Do I know how to complete all the smaller tasks that make up the project as a whole?
- Do I know how to use all the necessary tools?
- Do I know how to work with all the necessary materials?
- If there are steps I currently don’t know how to do or tools I currently don’t know how to use, do I have the foundation knowledge to learn?
- Do I have enough time to complete this project on my own without rushing the job?
- Do I have friends or family I can count on to help me if I need extra sets of hands?
- Do I have room in my budget to fix any mistakes I may end up making, and any additional damage that might result from those mistakes?
If you answered no to more than a couple of those questions, then your planned project is likely beyond your current skill level. Instead of forging ahead and causing yourself a long string of headaches and wasted dollars, it’s time to call in a pro. When you’re dealing with a construction project, the best thing you can do is be brutally honest with yourself about what you are and aren’t capable of.
Choose Another Remodeling How-To
Remodeling Debris Disposal Tips
- If you are removing fixtures, appliances, cabinets and other items that are still in good condition, consider donating them rather than demolishing them. There are numerous organizations that accept old household items as donations, including Habitat for Humanity.
- For drywall, flooring and other construction debris, the best disposal option is a construction dumpster. Our dumpsters are a quick and efficient residential debris removal solution. You can dispose of multiple tons of debris in a single construction container, just make sure you know what can go in a dumpster before you start tossing old mini-fridges and railroad ties into the container.
Want a Dumpster Today?
Click to Call for Pricing
- Save money with our affordable flat-rate prices.
- We offer small and large dumpster sizes for all types of projects.
- Need it fast? We offer quick dumpster deliveries.

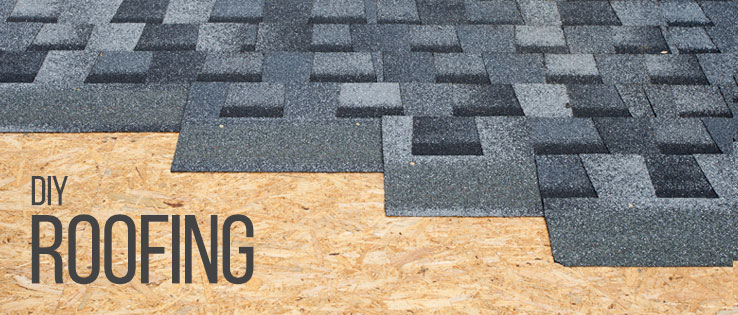
DIY Roofing:
The Roof is On Fire
Roofing is a lot of work, but it’s generally work that is completely doable for someone willing to learn the ropes. Going the DIY route with roof repairs is a great way to save money on your new home, while also ensuring that everything underneath it is kept safe from the elements. However, even though removing old shingles and laying new shingles are pretty common DIY tasks, there is some potential for calamity.
Don’t worry, simply follow our roofing how-to’s and you’ll avoid some of the bigger roofing problems out there.
Roofing How-To’s:
How to Install Asphalt Shingles
How to Install Valley Flashing
How to Prevent Ice Dams
How to Remove Old Asphalt Shingles
How to Hang Your Gutters
How to Keep Your Attic Cool
How to Install Asphalt Shingles
Just as the roof is your house’s first line of defense, shingles are the first line of defense for your roof. So, it’s important to make sure they’re set up to do the job right.
Step #1: Get the Right Number of Shingles
Generally, to cover 100 square feet of roof you will need three bundles of shingles. Measure the length and width of your roof’s sections to get the area, then add them together to get the total square footage of your roof. Divide that number by 100 to get the total number of squares, then multiply by 3 to get the total number of bundles you need.
Step #2: Measure Your Shingle Length
This will determine how your shingles will lay across the width of your roof. Most shingles are around 3 feet in length. In the likely case that your roof’s width is not an even multiple of your shingle’s length, you will need to trim your end shingles to fit the width.
Step #3: Install Underlayment
Underlayment is the layer of asphalt or waterproofing material that lies underneath your shingles, guarding against leaks and moisture. Installing it as easy as unrolling and stapling the sheets in place, trimming it down as necessary.
Step #4: Install Flashing
See "How to Install Valley Flashing".
Step #5: Use Chalk Lines to Mark Each Row of Shingles
Starting from the left side of the roof, use a piece of chalk to mark where each row of shingles will be placed based on the width of your chosen shingles.
Step #6: Grab a Hammer and Start Nailing
Each shingle should be secured with 5-6 nails. Shingles with a sealant strip on the front should be nailed in a line below the sealant strip but above the area of the shingle that will be visibly exposed. Shingles with a sealant strip on the back will be marked with lines to indicate nail placement. Remember that shingles should never be nailed in such a way that the nail heads will be visible and exposed to the elements.
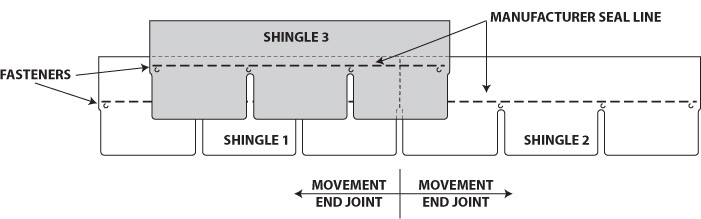
Each row of shingles overlaps the last to provide greater protection and keep nails from deteriorating.
What the Experts Say...
“If you’re installing roofing yourself it’s always beneficial to read the manufacturer’s guidelines carefully. It may often be viewed as “overkill”, but well-worth the effort considering the harsh elements roofing materials have to endure.”
How to Install Valley Flashing
Flashing is the metal sheeting that is installed in roof valleys and around chimneys, vents and other protruding roof elements. Because rain, ice and snow will naturally accumulate in valleys, flashing serves as an important second line of defense against moisture damage to your roof.
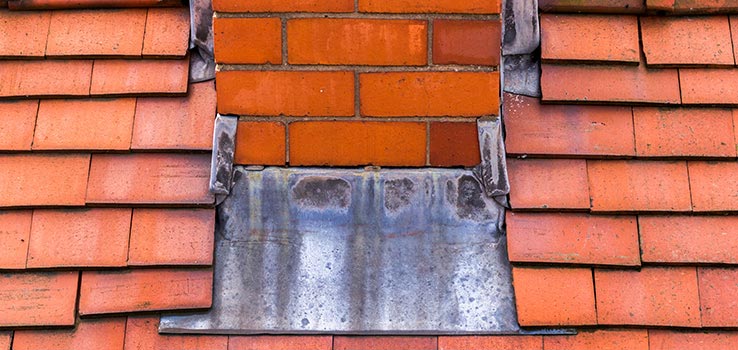
Flashing: its bright, shiny and a crucial component of any roof.
Consider putting a layer of waterproofing membrane under your felt underlayment before you install your flashing. This is a coding requirement in certain parts of the U.S., such as Ohio, Michigan and other states in the Snow Belt, but it’s a good idea no matter where you live. To do so, simply follow the instructions for whatever type of waterproofing membrane you choose.
Now, here’s what you do when it’s time to install the valley flashing:
Step #1: Find the Right Size Flashing
Generally, valley flashing can be purchased already shaped, so all you have to do is choose the shape that fits the valleys of your roof.
Step #2: Place Flashing in Roof Valleys
To install your valley flashing, lay it in the valley with the drip edges at the edge of the roof. If necessary, trim away excess flashing with a tin snip.
Step #3: Nail in Place
Nail the flashing to the roof at every foot along the outer edges. Never nail valley flashing down the middle of the sheet. This will weaken the flashing and put you at risk for leaks. If desired, you can seal the nail heads with roofing cement for extra protection.
How to Prevent Ice Dams
An ice dam occurs when a barrier of ice forms at the eaves of your roof, preventing melting snow from properly draining off. With nowhere else to go, that melt water can be forced under shingles, causing leaks and even structural damage to your roof.
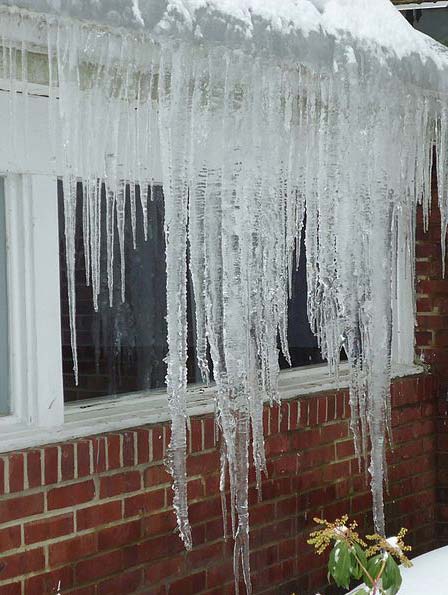
Unless you’re expecting a Red Rider Range Model Air Rifle for Christmas, get rid of ice dams pronto.
Ice dams are usually the result of poor ventilation and/or insulation. As heat escapes from a badly ventilated/insulated roof, it begins to melt the snow in certain areas. This melting snow slides down the roof, but because the weather is still too cold for a true melt, the melting snow freezes into ice as it reaches the eaves.
Follow these steps to prevent ice dams from forming on your roof:
Step #1: Check the Insulation
Check the insulation levels in your attic. You should have at least 12-14 inches of insulation, so if you have less than that in place, it’s time to add more.
Step #2: Install a Moisture Barrier
Consider laying down an ice-and-water barrier. This will require you to remove some shingles, starting at the edge of the roof and going up 3-6 feet. Those shingles can be replaced once the barrier is installed according to package instructions.
Step #3: Install Additional Vents/Heat Cables as Necessary
If ice dams have been a problem for you in the past, you may need to shell out to have additional vents installed. If this isn’t possible (either for budgetary reasons or because of your roof type) you can opt to install heat cables. (See Below)
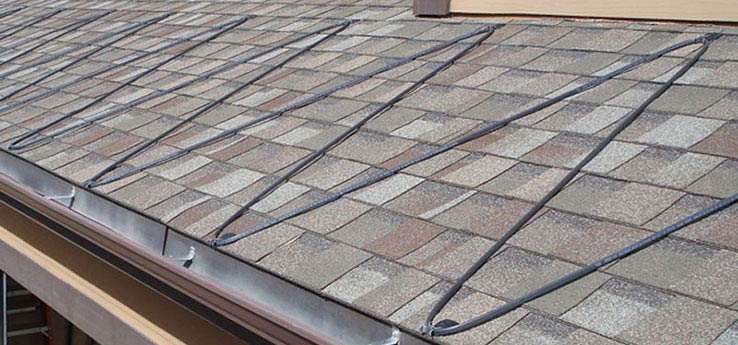
While you're up there, you have a great opportunity to take down your Christmas lights before July arrives.
Heat cables are wires you fix to your roof in a zigzag pattern in areas where ice dams frequently build up. All you have to do is flip a switch and the ice and snow on your roof will melt off. These cables can be bought in kits that come with everything you need to install them, plus instructions. Keep in mind that heat cables need to be plugged into a grounded outlet. If there isn’t one close-by, you may want to hire an electrician to install one.
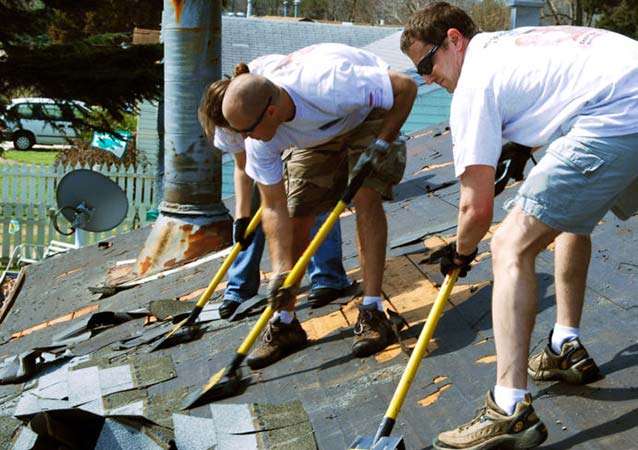
How to Remove Old Asphalt Shingles
Choosing to install new shingles over existing shingles is an extremely common choice in the DIY roofing game. The reason: it’s cheaper and a lot less work. But despite the upfront savings on money and time, shingling over an existing roof is almost always a poor choice. In most areas, code requirements dictate that there can’t be more than 2 layers of shingles on a roof. Also, if leaks develop in the future, they can be very hard to find and fix when you’re dealing with multiple shingle layers.
The obvious fix for this mistake is to bite the bullet and remove your current layer of shingles before installing the new layer. Here’s how to do it:
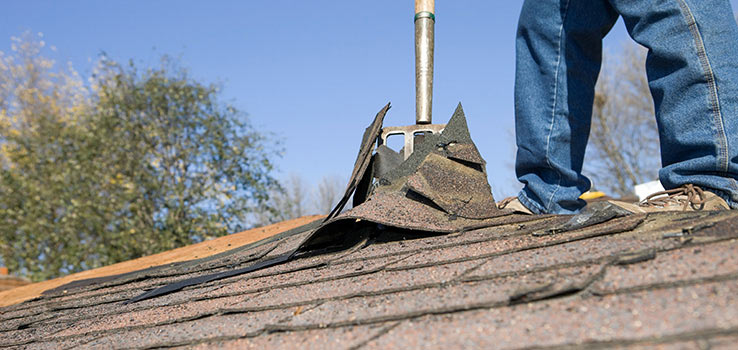
Getting rid of old shingles is a laborious affair, but with the right crew it can go smoothly.
Step #1: Assemble a Crew
Gather a team of helpers and secure the roofing dumpster you’ll need to handle shingle disposal.
Step #2: Pry the Shingles Up
Beginning at the peak, use a roofing shovel or garden fork, to work under a section of shingles and pry them up. Allow them to slide down the roof, and move onto the next section, working your way down from the peak to the eaves. Take periodic breaks from your work to toss shingles into the dumpster.
Step #3: Dispose of Any Loose Nails
When you’ve removed all shingles, go back over the now-bare roof to remove any nails you left behind.
Step #4: Sweep Away the Remaining Granules
Once the nails are out of the way, give your roof a good sweeping to clean up the shingle granules that got left behind by your tear-off.
That’s it—you’re ready to move on to the work of prepping your roof for the new shingle layer. For more information on getting the job done right, check out this step-by-step guide to removing shingles.
Watch your step! Shingle granules can be slippery so move carefully as you work.
What the Experts Say...

“Not everyone should attempt to replace the shingles on their roof. Climbing up on the roof can be dangerous if you do not know what you are doing and are not careful. If you are determined to repair isolated spots of damage to shingles on the roof yourself, proceed with caution.
#1 - Firmly nail replacement shingles to the roof decking, preferably not in the exact same nail hole as the removed shingle.
#2 - Address any damage to the underlying felt or plywood decking.
#3 - Secure new shingles to the ones above and underneath them with asphalt mastic.
Always consult an expert roofing professional if you feel out of your depth with a roofing repair or if you are worried that the problems can extend beyond what you see. Ignoring issues can create huge problems down the road. Using a free service such as ServiceWhale, you can find an experienced roofing contractor to evaluate your roof and perform the needed repairs in order to maintain your home’s integrity and value.”
How to Hang Your Gutters
On the surface, gutter installation seems like a pretty simple task. However, there are a lot of things you have to account for when installing them, such as making sure there’s a slight slope so that rainwater can easily flow down the spout.
You also have to watch out for sagging and leaks that can occur if you use too few hangers or allow too many seams in the gutters themselves. In order to avoid these gutter grumbles, follow these tips to ensure your gutter installation is done to perfection:
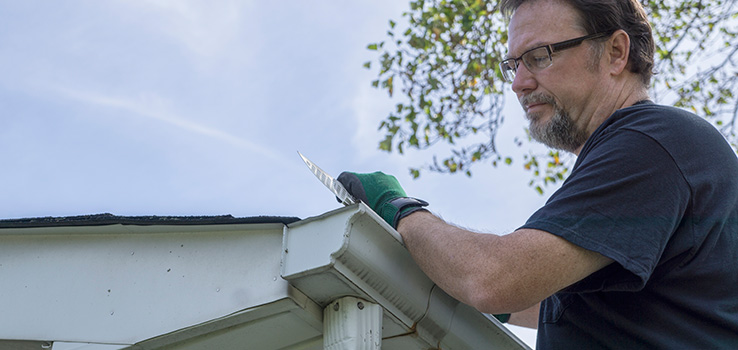
Your gutters should always slope one inch for every 40 feet.
Gutter Hanging Tips:
- To make sure water can flow freely through your gutters hang them so that they slope downward an inch every 40 feet.
- To avoid spillover, ensure that, even as they slope, your gutters hang level from front to back. In other words, the front lip is no lower and no higher than the back lip. To do this, simply keep a level handy as you work and check yourself frequently.
- To prevent gutters from sagging and beginning to leak, make sure the gutter hangers aren’t too widely spaced. You should leave no more than 3 feet of space between hangers.
- When in doubt, more hangers are always better than less. To keep the number of seams to a minimum, use the longest gutters you can find. You might also look into having seamless gutters custom-made for your roof.

Not the kind of gutter hanging we recommend you try at home.
What the Experts Say...
“Gutter maintenance is fairly easy:
#1 - To work properly, gutters must be kept free from debris. Using a ladder to reach the gutters, pull out muck, sticks and other substances that can clog gutters and downspouts at least twice a year.
#2 - Inspect your gutters every so often to be sure they are secure. If you find that they are loose, re-secure them with some new screws and possibly new hangers. You will also want to patch up any rust holes with waterproof epoxy and use sealant to ensure that there are no gaps in between gutter segments.”
How to Keep Your Attic Cool
When your roof is properly ventilated, you’ll enjoy lower utility bills and a more comfortable living environment. When your roof ventilation is out of whack, you put yourself at risk of moisture damage and various types of shingle damage, on top of higher utility bills.
To make sure your roof, and attic, are properly ventilated follow these roofing tips below:
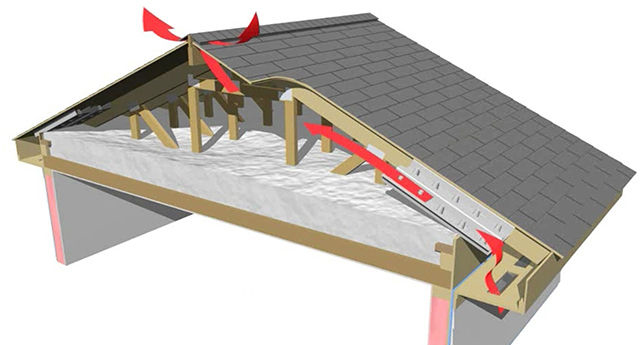
In ventilation, as in rap, it's all about flow. / Image Courtesy of Green Building Advisor
The primary cause of poor roof ventilation is an unbalanced number of intake vs. exhaust vents. Intake vents are located in the soffit (under-eave) or at the roof’s bottom edge. Exhaust vents are located near the peak.
- Having a balanced number of intake and exhaust vents, you maximize the efficiency of your ventilation system, allowing cooler, dryer air to enter the attic at the eaves while warmer, moister air exits the attic through the peak.
- To maintain a balanced ventilation system, the net free area of your intake vents should be equal to the net free area of your exhaust vents. You can use this calculator to figure out how much net free area your roof needs.
To ensure that your exhaust vents are holding up their end of the bargain, you should be using only one type of exhaust vent over the entirety of your roof. When you mix and match exhaust vent types, you interrupt the easy flow of air from intake to exhaust.
In fact, you may find that some of your exhaust vents have begun functioning as intake vents, undoing the balanced system you’ve created. Choose one type of exhaust vent and stick with it.
Types of Exhaust Vents:
Ridge Vent:
The most common type of roof vent. They are installed at the highest peak of a roof. Installation is fairly simple, but they can only be installed on roofs with enough of a peak for them to be effective. Once installed, they don’t require much maintenance to continue working properly.
Wind Turbine:
The second most common vent type. They are also fairly simple to install and can be used on any roof type. They can last a long time without needing maintenance.
Gable Vent:
Installed on the gables of a roof. This vent type may need to be combined with a fan to work most effectively.
Power Vent:
These are either electric or solar powered. They do very good work, but can be fairly high maintenance compared to other vent types.

You roof, too, could have looked like this--if you hadn’t read through these roofing how-to's. / Image Courtesy of Infrogmation
What the Experts Say...
“Many homeowners today are acting on the benefits of adding insulation to their attics. This will provide hands-down the best return on investment (ROI) for your home improvement dollar by saving on high energy costs. It is important to remember, though, to avoid blocking the attic vents and soffit areas as this could eliminate the flow of fresh air and cause problems with your home’s heating and cooling.”
Roofing Debris Disposal Tips:
- The best way to tackle roofing debris is to use a roofing dumpster placed as close to the side of the house as possible. Having a dumpster parked close-by will allow you and your roofing team to easily, and safely, toss old shingles, underlayment, plywood, nails and everything else into the container.
- If there isn’t enough space to place the dumpster next to the house, the alternative is to lay a tarp down on a flat piece of ground near where you are working and throw the debris onto it. Once the pile is full, simply ball up the tarp and throw it in the container and repeat as needed.
Want a Dumpster Today?
Click to Call for Pricing
- Save money with our affordable flat-rate prices.
- We offer small and large dumpster sizes for all types of projects.
- Need it fast? We offer next-day dumpster services.
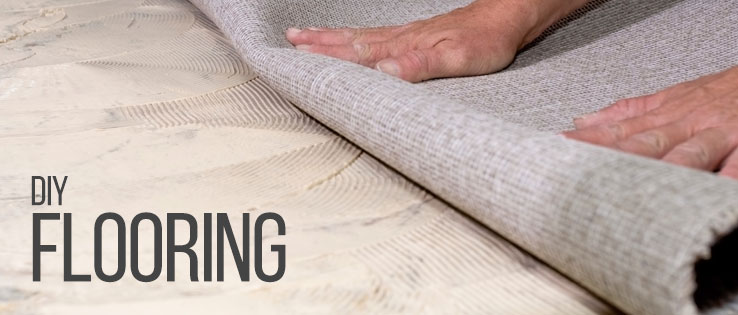
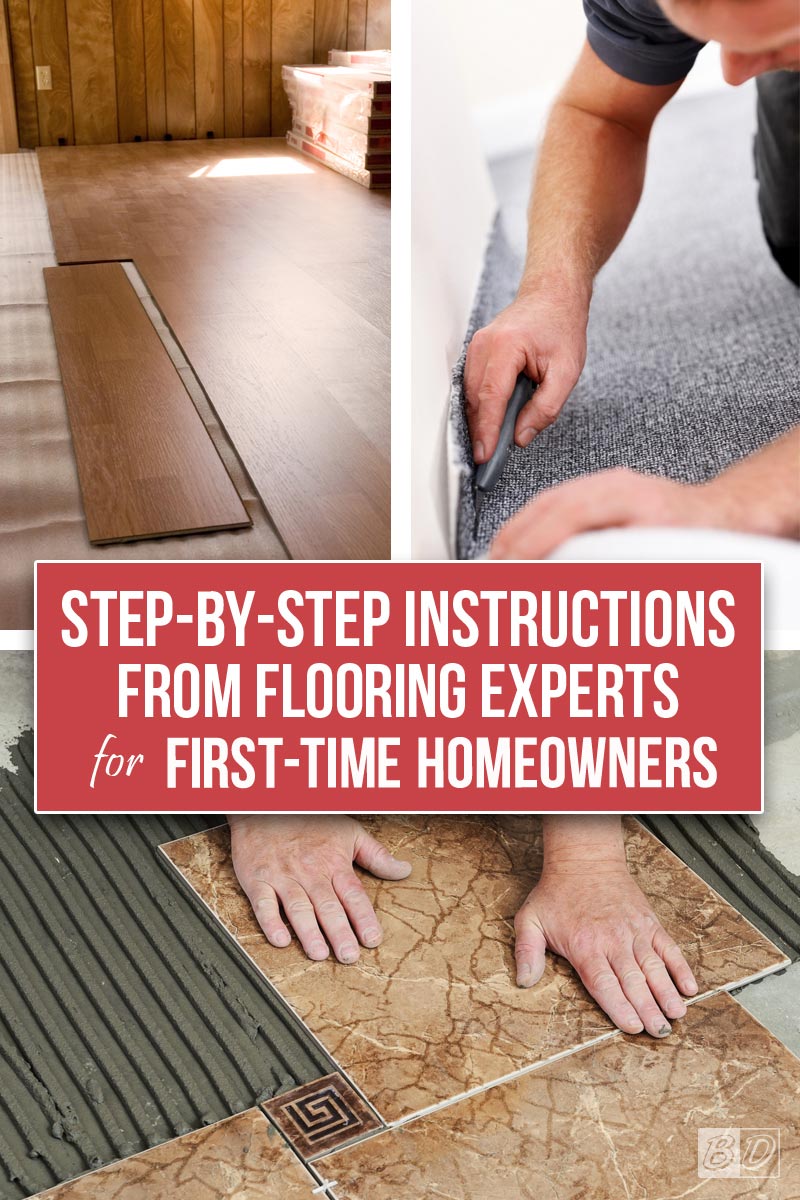
DIY Flooring:
These Boots are Gonna Walk…All Over a Perfectly Installed Floor
It holds you up, even on your lowest day. It supports you. It supports your entire family and everything you own. And how do you reward your flooring for its saintly work? You walk all over it and sometimes go months between moppings. With everything it puts up with every day, sometimes the best way to reward your floor for its years of service is to retire it when it starts to get worn out.
When new flooring is called for, a DIY-minded homeowner can save a lot of money by handling the installation themselves, provided you read through these flooring how-to’s first.
Flooring How-To’s:
How to Choose the Right Stone Flooring
How to Prep Your Subfloor
How to Install Tiles
How to Install Carpet Shims (And Why You Should)
How to Install Carpet Padding (And Avoid Carpet Ripples)
How to Install Carpet Minus the Lumps
How to Choose the Right Stone Flooring
Marble, granite and ceramic are all stunning hard flooring options, and many people assume that the only major differences between them are looks. In reality, even though these flooring types share some broad similarities, they differ in many important ways. Follow these tips below to find the right stone floor for your home:
Marble Flooring:
Despite what you might think, marble is a soft stone, which means:
- It can become worn down with frequent traffic.
- It is also very porous, which makes it susceptible to staining.
For these reasons, marble flooring should be reserved for use as an accent, not as the predominant flooring type in your home. This could mean a marble border for an entrance way, or marble flooring in a dining room or other area that is only used for special occasions. Marble should not be used in kitchens, which not only see high traffic but also frequent spills.
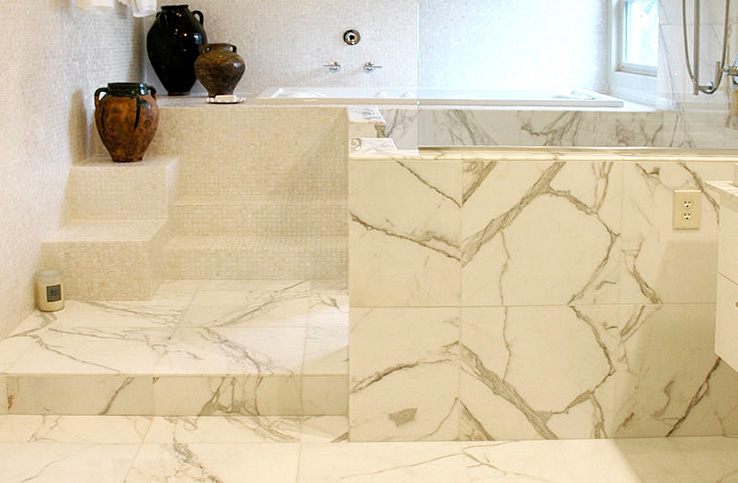
Marble: Perfect for your ceremonial throne room; not a great choice for your everyday feasting hall.
Granite Flooring:
Once it’s been properly sealed, granite is one of the most durable and hardy flooring options available. Granite can:
- Withstand moisture and stains.
- Hold up well even in high traffic areas without scratching or scuffing.
Like hardwood, granite is also highly sought after by homebuyers, so if you’re looking to add value to a house you may sell in the foreseeable future, granite is a sound choice.
Granite is well suited to high traffic areas like kitchens, entryways and hallways. The catch is that granite does require more maintenance than other flooring types. In order to maintain its durability, granite should be resealed once a year, especially in moisture-prone areas like kitchens or bathrooms (other areas may be able to go longer without resealing depending on the overall climate of your home).

Granite looks amazing, but it does require some maintenance.
Ceramic Tiles:
Ceramic tile is an appealing flooring option because of the huge variety of colors, patterns and textures available. Using ceramic tile also gives you more control over the final look of your floor than natural options like marble and granite, which can never be truly uniform. Ceramic tiles can be installed in virtually any area of the home.
There are some downsides to keep in mind though, such as:
- Ceramic tiles may crack if something heavy is dropped on them.
- Ceramic tiles also tend to amplify sound, which could be a problem in naturally noisy rooms.
- Finally, ceramic tile is one of the most difficult materials for a DIYer to work with. A special tile saw is needed to cut the tile to fit your room, and the mortar dries quickly, meaning that if you don’t lay the tiles straight and in the correct pattern right off the bat, you have very little leeway to fix things before the mortar sets.
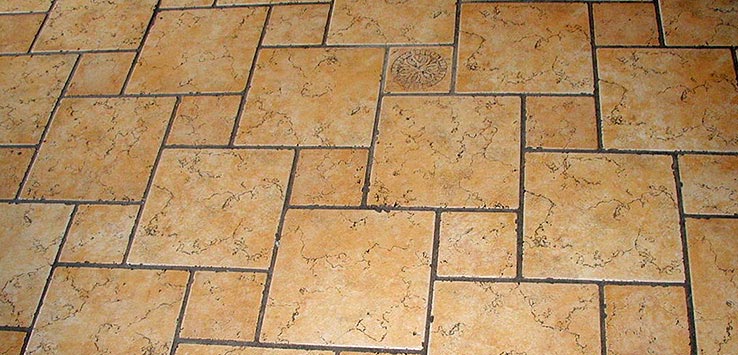
Ceramic tiles can be noisy and brittle, but no one can deny their aesthetic appeal.
What the Experts Say...
“Customer involvement with material choices results in more time, but less money spent. Clients can order tile and cabinetry supplies directly or have the contractor choose all of this for you. You can also check out wholesale tile stores for discounted prices on high-end flooring or check out craigslist for reduced price items. Search the web for local wholesale tile suppliers that have an array of materials and prices to choose from.”
Choose Another Flooring How-To
How to Prep Your Subfloor
The subfloor is what’s hanging out underneath your actual flooring. Prepping your subfloor properly is important for any flooring type you choose to install, but this is especially true for hardwood. A properly prepped subfloor is level, protected from moisture and structurally sound. Without a properly prepped subfloor, your hardwood floor will be uneven, at risk of moisture damage and will greatly decrease the wood’s durability.
Follow these steps to ensure your subfloor is prepped for your brand new flooring:

Psst...brown house...does my floor look uneven to you?
Step #1: Clean it Up
The first step when prepping your subfloor is simply to get it clean. Use a vacuum to get rid of dust and grit. If there is a significant amount of adhesive residue, paint or any other coating left behind from the previous flooring, sand those coatings away.
Step #2: Break Out the Level
Now it’s time to ensure that the floor is level. Use a large level to check the subfloor in multiple locations and from multiple directions throughout the room. A general rule of thumb is that the height of your subfloor should not vary by more than 3/16 of an inch for every 10 feet of floor length.
Step #3: Sand Down the High Spots
If you find high spots, sand them down. If the high area is large, or sanding proves difficult, consider renting a floor sander. If your subfloor is concrete, use a concrete grinder. When the job is done, vacuum up the dust.
What the Experts Say...

When Sanding a Wood Floor: "Start with a finer grit sand paper to get a feel for the drum [floor] sander while you’re still in the closet [test area]. Once you’ve gotten the hang of maneuvering the beast use the course 36 grit sand paper to get all of the existing finish off the floors."
Step #4: Fill in the Low Spots
If you find low spots, fill them in with a cementitious leveling compound. Once the compound is dry, sand away any rough, raised edges. Vacuum up the dust.
Step #5: Check the Stability of the Subfloor
Now you need to make sure your subfloor is structurally sound so that it can safely support the weight of everything in the room. Start by drilling a small hole in the plywood to determine how thick your subfloor is. Your plywood sheets should be at least ¾ inches thick. If any of your sheets are loose, screw them down firmly to the floor joists.
Step #6: Install a Moisture Barrier
Finally, you’ll want to install a moisture barrier, which is generally your best insurance policy against your floor eventually warping. Follow the instructions for whichever brand of moisture barrier you choose.
Important Note:
A moisture barrier is more important for some types of hardwood than others, so if you’re in doubt about whether to install a moisture barrier, go right to the source and look up what the manufacturer of your particular brand of flooring recommends.
Choose Another Flooring How-To
What the Experts Say...
Tips for Staining a Hardwood Floor:
#1 – If you’re sampling different colors..don’t put your test samples too close to the edge of a room. It’s easier to sand up the samples with a drum sander than it is with a hand sander you need to use around the edges.
#2 – Cut up an old white t-shirt to use for application.
#3 – Keep your bucket of stain and extra rags on a towel to make it easy to drag around the room.
#4 – KNEE PADS. Two pairs. One for your knees and another for your ankles/tops of feet.
#5 – The oils from your skin will alter how the wood accepts the stain. Long pants, socks and latex gloves [should be] your uniform.
Bonus Tip: Blurred Lines by Robin Thicke is an excellent song to stain to.
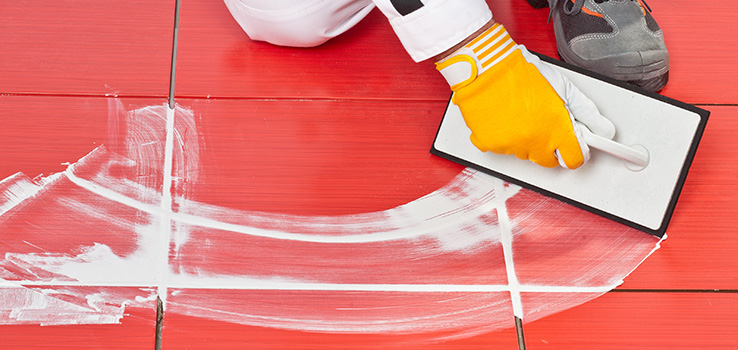
How to Install Tiles
Choosing to lay down your own tile floor is a money-saving option. But if you tell anyone about your plans to DIY your tiling job, chances are that that person will grab you by the shoulders and declare that creating a professional looking tile job on your own is impossible.
They’re right to be concerned. Even for experienced DIYers, laying ceramic tile is a difficult project. But if you’re determined to DIY your tiling job, there’s a surprisingly simple method to help ensure you’re laying each row of tile straight and in the correct pattern. That method: making a layout board.
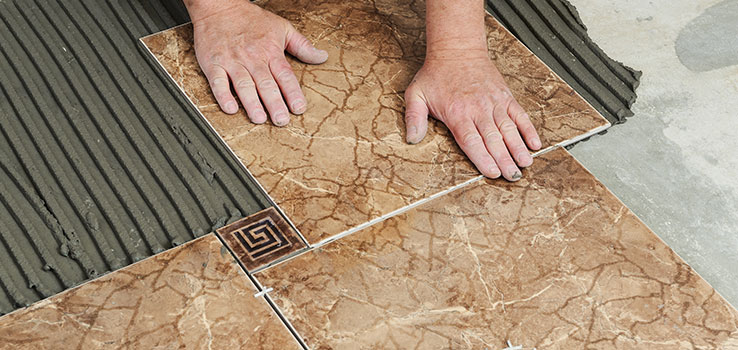
Installing tiles is easy as long as you plan ahead.
Step #1: Finalize Your Pattern
First, dry fit a row of tiles on your floor to finalize the pattern you want and the amount of space between each tile.
Step #2: Start Creating Your Layout Board
Find a straight and level piece of plywood to be your layout board. Place this board under your row of dry fitted tiles.
Step #3: Mark Your Tiles on the Board
With a permanent marker, mark slots on the board for each tile. In each slot, write the tile color that should go in that spot. If your plan is to use different tile patterns in different rows, make a layout board for each pattern.
Step #4: Line Up Your Tiles Row by Row
When it’s time to begin the actual tiling work, you’ll simply place your layout board beneath the spot where the first row of tiles will go, using a level to ensure it’s straight.
Step #5: Start Tiling
After you spread your mortar, all you need to do to ensure that your tiles are straight and in the correct pattern is to line each tile up with its slot on the board.
Step #6: Rinse & Repeat
Simply slide the board down, or swap in other boards, as your work progresses.

Even armed with a layout board, this is a little above your paygrade.
Choose Another Flooring How-To
How to Install Carpet Shims (And Why You Should)
It’s rare to find a house where the same type of flooring works in every room. Many people choose options like hardwood or tile for areas like hallways, bathrooms and kitchens that see a lot of traffic and a lot of messes. Other areas, like bedrooms and living rooms, will typically have carpeted floors to provide something soft and easy on the feet.

A carpet shim provides a smooth transition from high to low, like a pleasant winding road through a hilltop.
The problem arises where these two different floor types meet. Hardwood and tile floors will generally be higher than carpeted floors, and having a significant height difference between a carpeted and non-carpeted floor is obvious and unattractive. So when you’re going the DIY route with your flooring, you need to take steps to make the transition from room to room nice and even.
The solution to this problem is to install carpet shims (also called carpet ramps) under the carpet at the spot where the two floorings meet. Here’s a quick step-by-step to show you how to install a carpet shim:
Step #1: Measure Your Floor
Measure the length of the area where the two floorings meet.
Step #2: Measure & Score Your Shim
Measure the same length on your shim and score the shim on the rough side with a carpet knife.
Step #3: Break it Down
Break off the excess.
Step #4: Put the Shim in Place
Place your shim with the high side toward the other flooring, leaving a ¼ inch gap between the shim and the other flooring. Make sure your shim is positioned straight.
Step #5: Secure with Nails
Use ring shank nails to secure the shim to the subfloor. Use 5 nails for every 32 inches of shim.
Step #6: Install Side Shims
At the ends of the shim, install side shims, using a ring shank nail at each corner.
Step #7: Attach Carpet Tack
Attach a carpet tack strip at the edge of the shim, making sure to preserve the ¼ inch gap.
Step #8: Install Pad & Carpeting
Now simply install your pad and carpet, tucking the carpet edge into the gap.
Keep in mind that the width of the gap between the ramp and the other flooring may vary depending on the thickness of your carpet. For very thick carpet, you may need a wider gap. For very thin carpet, you may need a smaller gap. Test things out before nailing down your shim and adjust accordingly.
Whatever carpet you choose, keep it even.
Choose Another Flooring How-To
How to Install Carpet Padding (And Avoid Carpet Ripples)
When ripples develop in a carpet months or a year after installation, many first-time homeowners assume the carpet is to blame and run out to rent a power stretcher. As it turns out though, carpet ripples are often caused by problems with the carpet pad, not how tightly the carpet was stretched. This is a case where an ounce of prevention is worth a pound of cure. Taking the right precautions ahead of time will ensure a smooth, soft carpet for years to come.

Decorative ripples are fine.
Carpet Padding Installation Tips:
- The key to preventing any eventual ripples in your carpet is to choose good quality carpet padding.
- If a store offers free or cheap padding as a promotion to sell more carpet, don’t fall for it. The poor quality padding offered with these deals will wear down and lose its give over time, producing slack in the carpet above it and causing it to ripple.

Looks like a beautiful abstract painting. Actually keeps your carpet flat.
- To ensure you’re using good quality padding that’s right for your carpet, look up the manufacturer’s specifications for the type of padding they recommend.
- Most carpet manufacturers state in their warranties that using padding that doesn’t meet their specifications will void the warranty on their carpeting. Doing a little homework to choose the right padding will not only keep your carpet looking sleek, but will keep your warranty intact in case bigger problems arise.
Choose Another Flooring How-To
How to Install Carpet Minus the Lumps
So you’ve just completed your first DIY carpet installation in your new home. You put all the furniture back into the room and kick off your shoes to take a much-needed rest while enjoying the sleek look of your new carpet. Except a few days later it doesn’t look so sleek. Waves and lumps have cropped up in various places, undoing all your hard work.

Carpet should only be lumpy by design...
The first—and most often overlooked—step in making sure your carpet lies smoothly is to allow it to adjust to the humidity levels in your home before installation. Carpet can expand or contract based on moisture levels. So installing a carpet before it’s adjusted to your home environment means it will be doing that expanding or contracting after installation, affecting how tightly or loosely it lies.
Here are a few tips to follow when installing carpeting:
- Once you’ve brought your carpet home, wait at least 24 hours before installation to give it time to adapt to the conditions in your home.
- The next step is to rent a carpet stretcher for the installation. A carpet stretcher will ensure that you get a tight fit. Don’t worry, you can rent one!
- You will also need to rent a knee kicker for use in corners and along baseboards. Many DIYers opt to just use the knee kicker for the entire project in order to save money, but a knee kicker is not enough to get a flat surface throughout your carpet.
Important Note:
If you ever see a professional carpet installer exclusively using a knee kicker, it’s a major red flag that they aren’t as professional as they’d like you to think.
Choose Another Flooring How-To
Flooring Debris Disposal Tips
- Older vinyl flooring may contain asbestos, a material that can be potentially harmful when inhaled. If you are disposing of vinyl flooring installed between 1950 and 1980, you should contact an asbestos removal service that is properly equipped to safely dispose of the material.
- Other types of flooring, such as stone, hardwood, and modern linoleum are safe to dispose of using a roll off dumpster.
Want a Dumpster Today?
Click to Call for Pricing
- Save money with our affordable flat-rate prices.
- Small and large dumpsters sizes for all types of projects.
- Need it fast? We deliver dumpsters quickly.
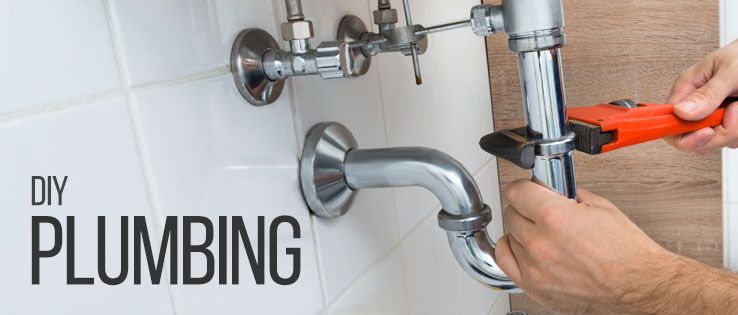
DIY Plumbing:
Taking Care of Business
Plumbing; it is both the greatest and smelliest innovation in human history. Without it we would still be relying on the do-it-yourself method of tossing our bath water (among other things) out the window and onto the head of some poor peasant. Fortunately, do-it-yourself plumbing has evolved since ye olden times, affording first-time homeowners and DIYers the opportunity to repair, maintain or modify their in-home plumbing themselves.
Of course, there is still a bit of a learning curve to doing your own plumbing. But you can easily brush up on your plumbing skills with these how-to’s below.
Plumbing How-To’s:
How to Find the Right Pipes and Fittings
How to Avoid Rusty Metal Pipes
How to Brush Up on the Plumbing Code
How to Adjust Your Hot Water Heater
How to Unclog a Shower or Sink
How to Unclog a Toilet
How to Shut Off Your Water
How to Fix a Leaking Pipe
How to Find the Right Pipes & Fittings
If your plumbing is on the fritz, odds are that you'll be making a trip to the hardware store to find a replacement. But before you start stalking the aisles looking for something that sort of looks like the same thing, make sure you know exactly what type and size of pipe or fitting you need.
Here a few simple tips to follow to find the right pipe replacement:
That’s the shiniest this will ever be.
- You can either measure the diameter of the pipe you are replacing or bring it with you so have a direct comparison.
- It is equally important to know what type of pipe you are working on. These days, most American homes use PVC piping for drain lines, which are relatively easy to repair.
- If you live in a home built prior to 1960, your pipes might be made of galvanized steel or cast iron, in which case you might want to err on the side of caution and have a certified plumber make the repair.
- Repairing, and even replacing, metal pipes is more difficult than standard PVC pipe repairs and requires a different set of tools.
Important Note:
Depending on the age of your home, you might want to consider replacing all the metal pipes in your home with PVC. These will both last longer and will be a lot cheaper to repair down the road.
Choose Another Plumbing How-To
How to Avoid Rusty Metal Pipes
Older homes that use metal in their drain lines can end up with a couple of unique problems, one of which is corrosion. Dissimilar metals and alloys naturally breakdown in the presence of electrolytes through galvanic corrosion (Fun Fact: regular tap water contains a small amount of electrolytes). This is the same process that turned the Statue of Liberty green which, while it looks great on a 150-foot-tall statue, is not something you want happening to your plumbing.
Rust, not even once.
Top Plumbing Tip: Use a Dielectric Union
If your plumbing system incorporates two directly connected metal pipes, there’s a good chance you’re going to end up with a corroded pipe somewhere along the line. In order to prevent this kind of olive drab decay you need to use a connector called a dielectric union.
This inexpensive fitting separates the two metals using a rubber washer and plastic sleeve, preventing them from making contact. You can find dielectric unions in any hardware store, and are easy to install yourself. Just be sure to shut the water off before you pull the two pipes apart.
Choose Another Plumbing How-To
What the Experts Say...

"Out of sight, out of mind doesn’t really apply to the plumbing world. Even if you can’t see it, food like pasta and rice will bloat in pipes causing clogs, blocking the passage for other waste to peacefully pass through the pipes. Without the proper amount of water to rinse it down, waste builds up in the pipes and makes drainage inefficient."
"Prevent blockage and clogging problems by using sinks, toilets, and showers correctly. Make sure to fill basins with water before draining. For showers, place a hair screen in the drain to reduce the human hairballs that rival anything your cat coughs up."
How to Brush Up on the Plumbing Code
As with any home improvement project, it’s important to know the relevant building codes for your particular project. Messing about with your plumbing is no different. After all, you don’t want to be stuck in the unenviable position of turning the water back on and finding this scene in your bathroom:
Don’t be like Curly.
Any and all amateur plumbers out there should be versed in the Uniform Plumbing Code, a set of industry standards published by the International Association of Plumbing and Mechanical Officials. The Uniform Plumbing Code covers everything from water heaters to storm drainage, and is a first line of reference for all plumbing objectives. However, local plumbing codes may differ from the UPC, in which case you should always defer to local codes which can be picked up at your city’s building/housing department. You can order a copy of the UPC in its most current form from the IAPMO.
Choose Another Plumbing How-To
How to Adjust Your Hot Water Heater
Enjoy having a hot shower in the morning? Then you'd better check the setting on your mixing valve. A thermostatic mixing valve blends hot and cold water together, ensuring that you have a constant supply of tempered water that is safe for bathing. But if the water heater in your new place was upgraded or replaced, there’s a chance you might have messed with the valve and forgotten to return it to an appropriate temperature.
Here are a few tips to help you adjust your hot water heater:
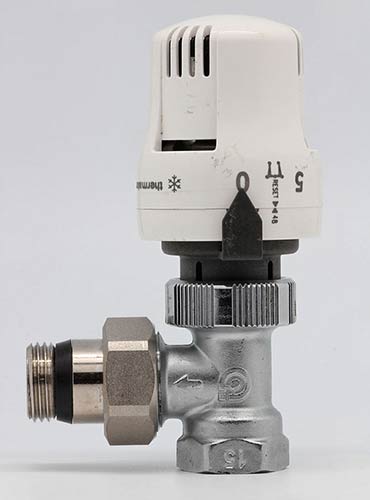
If you're familiar with a radiator valve, you'll be able to work your mix valve easily. / Image Courtesy of Coyau
- A basic mixing valve will include a heat-sensitive strip attached to the forward pipe that will tell you the temperature of the blended water. Others will have a knob, similar to a radiator valve, that you can turn to a set temperature.
- Make sure you turn on a faucet or other source of running water before turning the valve so that any temperature changes take effect immediately.
- The standard setting for a mixing valve is 120°F, though some municipalities may specify a slightly lower setting of 118°F as an added precaution against scalding.
- While you are tweaking the valve settings, you can also check the temperature of your water heater. The standard temperature for storing water is a crisp 140°F or above; hot enough to keep even the hardiest of microbes out.
Choose Another Plumbing How-To
How to Unclog a Shower or Sink
Clogged showers and sink drains are a once-in-a-blue-moon problem that we don’t really consider until that one fateful morning when the tub drain starts spitting up water and turns your nice, clean shower into a murky pond. But before you start experimenting with chemicals, bear in mind that chemical drain cleaners can cause severe damage over time. In fact, many a plumber will tell you to stick to tried-and-true mechanical solutions before reaching for the Drano.
Here’s a quick play-by-play for unclogging a shower or sink drain:
Step #1: Attempt to Locate the Clog
Try locating the clog by removing the stopper or strainer and cleaning it up.
Step #2: Use Hot Water
Pour some hot, but not boiling, water down the drain to try and loosen up the gunk further down the pipe.
Step #3: Use a Plunger
If the hot water doesn’t do the trick, try using a plunger. You'll first want to fill the basin with enough water to cover the plunger about halfway up the cup, and then stuff a wet rag into the overflow hole. Move the plunger up and down a couple of times, stopping to break the suction after a few tries. If it works, you should see the clog coming up and the water draining down. If the clog remains, it’s time to ditch the plunger and upgrade to a plumber’s snake, or hand auger.
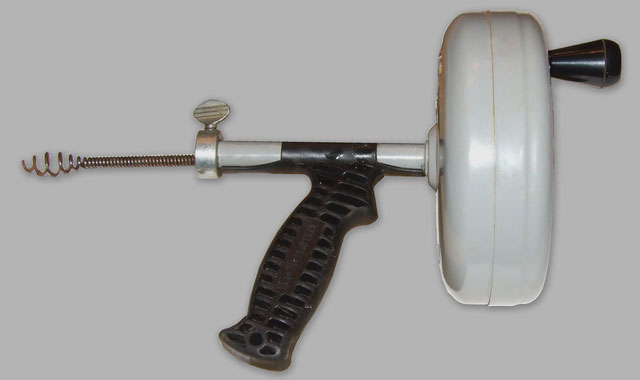
A replica laser pistol from the 1980’s classic “Flash Gordon” - AKA a hand auger. / Image Courtesy of Pgdp123
Step #4: Rent or Buy a Hand Auger
You can buy a manual auger from any old hardware store, though prices will range anywhere from $10-$40. Powered, professional-grade augers can be rented from any large home improvement store if your clog situation demands it.
Step #5: Snake the Drain
Using a hand auger is very simple; all you have to do is remove the cover from the overflow pipe (if dealing with a tub) and feed the auger down the drain by turning the plastic drum. You want to make sure there’s no slack in the line so you can push the cable past the bend in the pipe. Keep feeding the cable down the drain until you meet some resistance; that’s your clog!
Push a little more to dislodge it and you should see any standing water start to drain immediately. Turn on the water to test the flow. If the drain is still a little slow, turn on the hot water and move the auger back and forth until the water drains to perfection.
Choose Another Plumbing How-To
How to Unclog a Toilet
And now for the fun part. Knowing how to unclog a toilet is a key skill for any homeowner, both for first-timers and those on their third house. Fortunately, unclogging a toilet is very simple so long as you know what you’re doing.
Here’s a quick step-by-step to follow when your toilet gets clogged:
Step #1: Start with a Plunger
A simple plunger is all you need for a toilet that is clogged or drains slowly. Simply grab your plunger, place it over the drain so that the cup is immersed in the water. Now, plunge down gently to force the air out of the bell. Plunge vigorously 15-20 times while maintaining the seal.
Step #2: Time to Snake It
If the plunger fails to clear the clog, it’s time to get a drain snake or closet auger. A typical drain snake works by feeding a wire coil around the u-bend and down through the drain. The snake’s corkscrew tip hooks into the clog, allowing it to dislodge and push the obstruction down the drain.
However, the best tool for removing troublesome toilet clogs is a closet auger. It functions relatively the same as a drain snake, with the added benefit of getting around the u-bend easily and allowing you to keep toilet matter at an arm’s length.
Step #3: Remove the Toilet
Desperate times call for desperate measures. If the obstruction lies further down the drain, then you will have to resort to removing the toilet entirely and snaking the main drain. This will require shutting off the water supply, removing the mounting bolts on the toilet and partially disassembling the toilet itself. This will give you greater access to the drain.
Important note:
Do not pour boiling water down a clogged toilet drain as the sudden temperature change can damage your pipes, especially in winter time when pipes are most brittle.
What the Experts Say...
"I don't even have a plunger among my plumbing tools! While this has been used by many people for many years, using it for a toilet is not a very good idea. Here's why:
- It could push the blockage even further down the pipe.
- The pressure exerted by the plunger could blow out the wax seal, without you knowing it.
- "Toilet matter" could be pushed up into the siphon jet of the toilet (that's the little hole that water comes out to help the toilet start to flush).
- It can splash! You certainly don't want any "toilet matter" splashing around, on to your face, clothes and the room itself...it is a genuine honest-to-goodness health hazard!
So, what should you use to clear a toilet clog? A closet auger. They are the right tool for the job and affordable too."
Choose Another Plumbing How-To
How to Shut Off Your Water
It’s a classic tale of woe and comically long repair bills. You leave the house for a few weeks while your home is being renovated. Everything is going great down in the Caribbean, but upon returning to home sweet home you discover that a pipe burst in the basement and turned your comic book collection into cold, soggy papier-mâché. It doesn’t have to be this way though, so long as you take a few preventative steps before heading out the door.

Knowing where your water shutoff valve is ahead of time can save a lot of water and a lot of money.
The best way to keep your pipes from bursting, or to prevent any sort of leak while away, is to shut off the water. The process to do so is very simple:
Step #1: Locate Your Main Water Valve
Every home has a main shutoff valve located on and/or near the water meter. If your home has a basement or crawlspace, this can usually be found on a wall facing the front of the house. If your home is built on a slab, you will probably find it near the water heater or in the garage.
Step #2: Turn the Valve to the “Off” Position
All you need to do is manually turn the valve handle clockwise to shut off the water. The “off” position should be clearly labeled on the pipe itself.
Important Note:
If you’ve searched high and low and still can’t find the valve, then it’s possible that it’s located in a box near the street. Simply remove the lid and turn the valve using either a valve key or a screwdriver and wrench.
Step #3: Drain the Plumbing
Once the water is shut off you want to make sure you drain the water from your pipes. Do this by running the hot and cold water from every water fixture until they stop running. You can close the fixtures once they are fully drained since there’s no risk of pressure building up without water in the pipes.
Choose Another Plumbing How-To
How to Fix a Leaking Pipe
It’s a brisk, sunny Saturday afternoon and you’re relaxing in the living room with a cold adult beverage. When suddenly, you hear a rush of water and a yell from the basement. Before you know it, your afternoon is ruined by a growing puddle of water by your washer and dryer.
Fortunately, a leaky pipe has a relatively simple fix. Here’s a quick how-to for fixing a leaking pipe:

Hopefully your pipe isn't as leaky as this one.
Step #1: Shut Off the Water Valve
If the leak is isolated to a section of pipe with its own valve, switch the water off at the valve. If not, then you should shut off the main water supply to the house instead. See our tutorial on finding and shutting off your main water valve.
Step #2: Drain Your Faucets
While the water is shut off, open the faucets and let the remaining water in the pipes drain out.
Step #3: Towel Off
Use a towel or cloth to dry off the leaky pipe. This is important to ensure that the epoxy and rubber adhere to the pipe.
Step #4: Apply Epoxy
Using a putty knife, apply a small amount of epoxy to the damaged portion of the pipe. This will seal the break in the pipe without having to replace the section altogether.
Step #5: Attach a Rubber Coupling
Attach a rubber coupling to the pipe for added protection. This will ensure that if epoxy fails, you won’t have a torrent of water pooling on your floor again. Once the coupling is in place, use a clamp to secure the rubber and leave it in place for one hour.
Step #6: Tape it Up
Grab a roll of water resistant tape and wrap it around the rubber coupling. This will add another layer of protection against any future leaks.
Step #7: Turn the Water Back On
Once the epoxy and rubber have set, switch the water back on to check that the leak is fixed. If no water leaks out, you’re good to go. However, you should make sure to have a plumber come out to take a look and make a more permanent fix.
Choose Another Plumbing How-To
Want a Dumpster Today?
Click to Call for Pricing
- Save money with our affordable flat-rate prices.
- Small and large dumpster sizes for all types of projects.
- Need it fast? We deliver dumpsters quick.
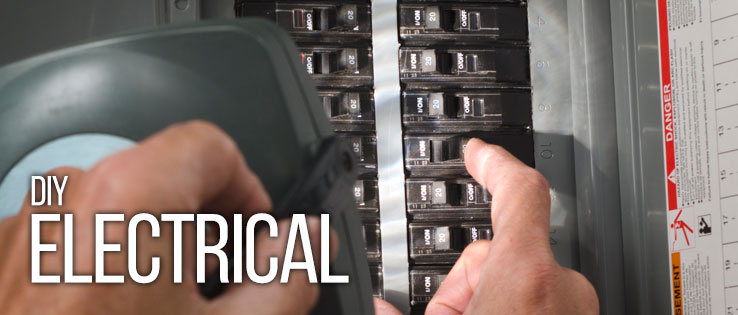
DIY Electrical:
Your Electric Slide is Not Up to Code
Electricity is a hell of a thing. It illuminates our offices, provides heat to our homes and powers portable devices that we can use anywhere, even in the bathroom! Harnessing this mysterious force is truly one of the greatest achievements of our civilization. Yet for first-time homeowners, working with the various wires, switches, fuses and boxes used to deliver electricity to the home can be a bit overwhelming. Which is why signs like these exist:
But don't let the sparks fool you, there are plenty of non-technical electrical fixes you can make to your new home. All you have to do is read up on some of these electrical how-to’s and learn what you can and probably shouldn’t do when DIYing your electrical work.
Electrical How-To’s:
How (and Why You Need) to Get an Electrical Permit
How to Replace a Circuit Breaker
How to Replace an Outlet
How to Tell if a Wire is Live
Why You Should Upgrade Your Electrical Panel
Before You Start Twisting Wires
Understanding the basics of electrical wiring is essential if you plan on touching anything – and we mean anything – in your home that carries an electric current. Every home’s electric service runs through the main electrical box, either a fuse box or circuit breaker, where power is distributed to all the circuits in the house. Each circuit carries power to all the outlets, switches, conduits, lighting fixtures, appliances and devices in the home.
Most electrical issues can be resolved at either the main electrical panel or at the individual power outlets and fixtures that dot the home. But occasionally, a homeowner will come across a problem that can only be remedied by opening up the walls and fixing the wiring running throughout the house. In those cases, it is highly recommended to call in a licensed electrician for both your safety and to ensure that the new wiring follows the electrical codes of your city.
Essential Electrical Terms You Need to Know:
Wires:
- Line (hot) - The line wire carries the power through the circuit.
- Neutral (load) - The neutral wire returns the power, completing the circuit.
- Ground (earth) - The ground wire is a safety feature that directs excess voltage towards the ground, preventing shocks and damage to the wiring.
Equipment:
- Circuit breaker - These are electrical switches that are designed to sever electrical connections in the event of a power surge, short circuit or other electrical problem.
- Electrical Panel (breaker box) - The main service box that houses all of your home’s circuit breakers.
- New-work boxes - Electrical boxes that are installed before the drywall is hung, generally nailed directly to wall studs.
- Old-work boxes - Electrical boxes that are installed directly into drywall, typically used in remodeling projects.
- Wire nuts - Plastic screw caps that tie two or more wires together.
How (and Why You Need) to Get an Electrical Permit
Almost every project that involves modifying your home’s electrical wiring requires a permit, whether you’re adding a set of outdoor lights to a garden path or installing a Jacuzzi in your living room (it’s a thing, trust us). And that includes installing new electrical devices, running new wiring or installing new outlets and light fixtures.
Getting an electrical permit is easy, just follow the steps below and you’ll be all set to start playing with electricity:

Step #1: Get Your Paperwork Together
In order to pull an electrical permit, as well as building permits, you will generally need:
- A description of the work to be done.
- A cost estimate.
- The total square footage of your renovation.
- Contractor information (if working with a professional).
- Length of time you intend to stay in the house while renovating.
There is a lot of overlap between permit applications, so if you need additional permits for your project you can apply for them all at once.
Step #2: Submit Your Application
Your local city government will allow you to apply for an electrical permit either at their office or online. Depending on the project, and the building codes in your city, you may need to have a certified electrician perform the actual work, which the department will notify you of when they review your application. Costs for individual permits will vary by location, though the costs are typically lower for residential projects as compared to commercial renovations or construction projects.
Step #3: Pick Up Your Permit
Processing a permit application generally takes only a few days. If you end up waiting longer than a week, be sure to contact the permitting office to verify the status of your application. Unless there are some glaring issues in the paperwork, you should be good to go within 3-5 days.
Some projects will require inspections both before and after the work is completed, so be prepared to work with county inspectors to ensure the electrical work is done to code. Getting the proper permits upfront will ensure that the electrical work will be up to code, keeping you and your family safe, and making it way easier to sell your house down the road.
Choose Another Electrical How-To
How to Replace a Circuit Breaker
Replacing a circuit breaker is relatively simple, especially if you have a feel for electricity (or an Electric Feel, as the kids say). The only thing you want to avoid doing is replacing your faulty breaker with the wrong type of circuit breaker. If you install the wrong one, the circuit breaker won’t trip if the circuit overloads, causing the wires to get hotter and hotter until sparks start flying.
To replace a circuit breaker, simply follow these steps:
Step #1: Identify the Amperage
Identify the amperage of the circuit breaker you are replacing.
- Bedrooms and living rooms typically run on 15-amp circuits, since they generally only need to power lights, televisions, and the occasional massage chair.
- Kitchens, bathrooms, and laundry rooms will generally run on circuits ranging from 30-50 amps due to the number of energy-intensive appliances installed in these areas (think electric ovens, dishwashers and garbage disposals).
- Each circuit breaker should have its amperage marked on the handle or on the top part of the module.

Note: This is not a printer cartridge. / Image Courtesy of CyberXRef
Step #2: Switch Off the Power
Once you have your replacement circuit breaker, install it by first switching off the main electrical panel. This will cut power to the circuit breaker box, as well as the house, so warn the other members of your household beforehand.
Important Note:
If you know what you’re doing, you can simply move the circuit breaker to the off position, rather than switching off the entire panel. That way you don’t have to reset all your clocks.
Step #3: Remove the Old Breaker
Locate the mounting point of the breaker you intend to replace. Use a screwdriver to undo the clamp holding the line (hot) wire in the breaker and move it to the side. Remove the breaker from the slot by lifting up one side of the unit and then the other.
Step #4: Install the New Breaker
Now, take the new breaker and insert it into the empty slot. Reconnect the lead wire into the clamp and fasten the screw above it snugly, but not too tight.
Step #5: Power Up
Switch the new breaker to the ON position, and then turn the main power back on. If the new circuit breaker doesn’t switch itself off, you’re done.
Illuminating Tips from Batteries + Bulbs

- LED’s are 85% more energy efficient than their incandescent replacements and you would have to replace 25 incandescent light bulbs (on average) before you would have to replace one LED light bulb.
![Click to Tweet]()
- When looking at replacing a standard 60W light bulb with a 10W LED, you can save roughly $138 over the life of the LED bulb.
- Unsure which LED is right for your living room, kitchen, patio, etc? Use this LED buying guide to help you make the “light” choice: The 411 on LEDs.
Choose Another Electrical How-To
How to Replace an Outlet
Every once and a while an outlet will wear down to the point that it can no longer hold a plug. That’s when you know you need to replace the power outlet. Replacing an electrical outlet is relatively simple, though the amount of wiring involved can be cumbersome depending on where the outlet lies in your home’s internal wiring. But as long as you follow proper safety measures, most outlets can be DIYed.
Here are the steps to follow to replace a standard duplex outlet:
Some electricians like to install outlets upside down so they don’t appear as shocked / Image Courtesy of Budget Dumpster
Step #1: Turn Off the Power
Go to your main fuse box or circuit panel and cut the power to the section of the house where the outlet is located. There should be a diagram on the inside of the electrical panel showing you which fuses/breakers go with each circuit in the house.
Step #2: Remove the Cover Plate
Use a screwdriver to remove the cover plate from the outlet. Use a voltage tester on the wiring to ensure that the circuit is dead.
Step #3: Pull Out the Receptacle
Unscrew the receptacle from the electrical box and pull it out of the wall with the wires still attached.
Important Note:
When working on electrical wiring, always make note of which wires are hot and which are neutral. In the US, black wires carry the power (hot) while the white wires carry it downstream (load).
Step #4: Remove the Wires
Use your screwdriver to loosen the terminals holding the wires in place, then uncoil and remove the wires. If the tabs connecting the two sets of terminals on each side are removed, remove the same tabs on the new receptacle before installing it.
Step #5: Attach the Wires to the New Receptacle
Coil the wires around the corresponding terminals on the new receptacle. Each terminal should be colored to correspond to the color of the appropriate wire (black to black, white to white). If the outlet contains a green ground wire, make sure it is attached to either the green terminal on the receptacle or the electrical box itself.
Step #6: Replace the Cover Plate and Power Up
Push the new receptacle into place and screw it into the electrical box. Then, replace the cover plate and turn on the power. Your new outlet should be ready to go!
Important Note:
Installing a three-prong outlet without a grounding wire won’t damage the outlet, nor will it damage any of your devices or appliances. But it does mean that if a live (hot) wire comes loose, the outlet itself may become electrified and potentially harm or cause fatal injury to anyone who touches it.
If you discover that your home has not been updated with ground wires, you should consider having an electrician rewire your house so that every circuit has a grounding wire built into it.
Choose Another Electrical How-To
How to Tell if a Wire Is Live
It’s always important to keep track of which wires are which when wrestling with a wiring problem. If you accidentally mix up the hot, neutral or ground wires while installing a new outlet you may end up tripping the circuit breaker.
Here in the U.S., the National Electrical Code stipulates that all line wires (hot) should be colored black, red, or blue. Load (neutral) wires are always colored either white or grey, while ground wires can be either bare or colored green/green-yellow. Most outlets you’ll find at the hardware store also include color-coded terminals that correspond to the color of the wire that connects to it. As long as you follow the color scheme, you’ll always know which wires are which.
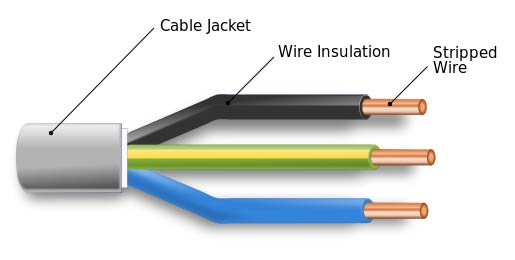
A sample of standard Romex cabling you can find at the hardware store. / Image Courtesy of Marekich
For extra safety, you can use a small voltage tester (aka fluke pen) to test each individual wire so you can safely identify which ones are live.
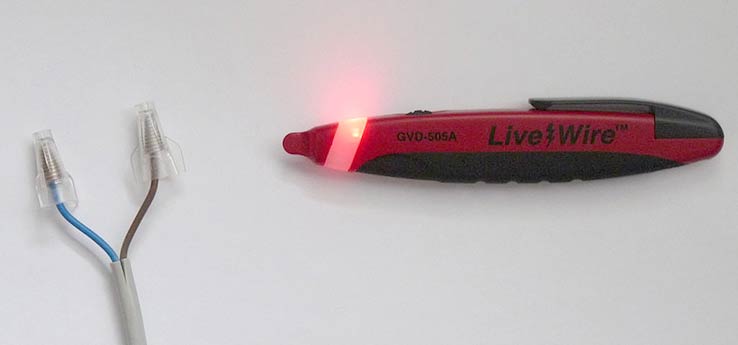
Move over stud finder, it’s the fluke pen’s time to shine (or beep). / Image Courtesy of Dmitry G.
Choose Another Electrical How-To
Why You Should Upgrade Your Electrical Panel
In the days before the circuit breaker, homes received their electricity exclusively through a fuse box. If the circuit shorted or became overloaded, the circuit’s fuse would pop, cutting the power. While fuses were good enough for grandpa, they aren’t so great for the energy demands of the modern home; especially if you are upgrading your home theater setup to include a projector, surround sound, a media server and a climate-controlled wine rack or two.
If your fuse box looks like this, you should probably hold off on the 3D surround sound system.
Obviously, the best way to avoid overpowering an old fuse box is to limit the amount of appliances and electronics running in your home (or avoid buying a home that has one). But if you are upgrading your home’s entertainment system, or even adding a bunch of appliances, you should definitely consider replacing the fuse box with a modern electrical panel.
Why? Because any home running off of the original fuse box is most likely only pulling down 40-60 amps of electrical service. Homes built within the past 40 years typically pull down 100 amps, while brand new homes pull down over twice as much at 200 amps!
“IT BELONGS IN A MUSEUM!”. / Image Courtesy of P. Gordon
The typical cost of upgrading a home from 40 amps to 200 amps service ranges from $1,300 to $3,000. That may seem steep, but it’ll immediately pay dividends by allowing you to safely power everything in your home. And if you decide to sell down the road, your home will be entirely up to date!
Choose Another Electrical How-To
Want a Dumpster Today?
Click to Call for Pricing
- Save money with our affordable flat-rate prices.
- Small and large dumpster sizes for all types of projects.
- Need it fast? We deliver dumpsters quickly.