How to Remove Carpet From Start to Finish

How to Remove Carpet
DIY carpet removal is easier than you might think. With the right tools and some help, you can complete the whole project in a weekend by following five simple steps.
Cost of Removing Carpet
Pulling up carpet and getting new flooring can make a huge impact on your home during a remodel – but it can also impact your budget if you’re not doing it yourself.
The average cost for a contractor to remove carpet is $1-$5 per square foot. However, the cost of your carpet removal depends on where the carpet is, how it was installed and if mold is present. For example, removing carpet from stairs is more difficult — so more expensive — than removing carpet from a living room. And if your carpet is glued down to the subfloor, you’ll pay a little extra for adhesive removal.
Carpet Removal Tools and Supplies
Before you start pulling up carpet, make sure you have all the tools you need for removal. All these supplies should cost less than $100, and you’ll save if you already have a hammer, pry bar and utility knife in your toolbox.
- Duct tape
- Gloves
- Dust mask
- Safety glasses
- Knee pads
- Locking pliers
- Pry bar
- Hammer
- Utility knife
- Ring shank nails

“It may seem basic, but invest in the right tools for the job. Too often I try to complete a project without the best tool for the job, and it takes twice as long. Removing carpet is very budget-friendly, with only a few inexpensive, specialty tools required.”
Lora Green | Craftivity Designs
How to Pull Up Carpet Without Damaging It
Your carpet will be easier to remove without any damage if it’s secured to the floor with tack strips. We'll explain what tack strips are and how to remove them a little farther down. If your carpet is glued down, it will be difficult to remove it without damage, as it is likely to tear once you start pulling it up.
The best way to avoid damaging your carpet is by asking someone to assist you with your carpet removal. Having an assistant help you pull up the carpet will prevent you from ripping it, especially when removing larger, heavier pieces. When you begin, have your assistant pull up the carpeting away from the wall while you detach it from the tack strips. As you move through the room, have your assistant roll up the carpet.
A Step-By-Step Guide to DIY Carpet Removal
Now, it’s time to learn how to rip up carpet no matter which room you’re working in. In five easy steps, you’ll have a clean slate to install the flooring of your dreams.
1. Start Pulling Up Carpet From One Corner
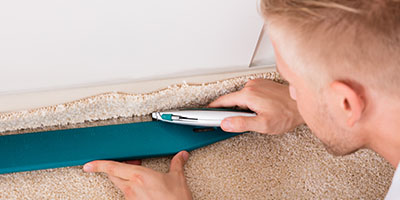
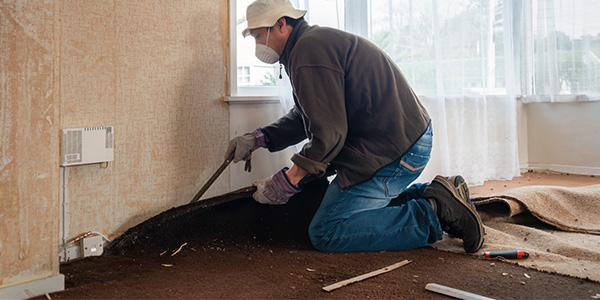
The easiest way to remove carpet is by picking a corner of your room and pulling up the carpet, making sure to avoid the prickly tack strips around the edges. If the carpet won’t budge with sheer force, cut a small square out of the corner with your utility knife. Then, you can pull on the larger section and begin to rip up the carpet.

Carpet Removal Tip: Most carpet doesn’t run underneath baseboards. But if you’re one of the unlucky few with carpet under your trim, you’ll have to remove them first. Learn how to remove baseboards without damaging your walls in the process.
How to Remove Carpet From Hardwood Floors
As you pull up carpet from the first corner, you’ll quickly be able to see if hardwood floors lay underneath, which may influence your decision to get new flooring or simply refinish your existing hardwood.
If you are removing carpet to expose hardwood floors below, you’ll need to be extra careful during this first step. Line up your initial cut with your utility knife along the tack strips to avoid damaging the hardwoods underneath. Typically, this would be about one inch from the wall. Then, use your pliers to grip the fibers and start pulling up the carpet you’ve cut.

Carpet Removal Tip: Over time, the rubber foam from carpet padding may react to the finish on the hardwoods underneath and fuse the two. You may need the help of a professional and a floor sander to remove any padding stuck to the hardwood floor.
Removing Carpet From Stairs
Start by cutting near the risers (the vertical pieces between one step and the next) at either of the top corners. Tack strips and staples hold the carpet in place, particularly on the treads and risers. So, it’s important to wear gloves and collect loose staples as you go so they don’t scatter everywhere.
If there is a metal nosing – the horizontal edge that sticks out on a stair – at the top of the stairs, pry it up and take it off. Otherwise, you can grab the cut corner and start pulling up the carpet away from the stairs. As you work your way down the stairs, cut the carpet where necessary so you can remove several large strips of carpet at a time. Then, roll them up into manageable sections. If your stairs have banisters, carefully cut around them in smaller pieces.
Removing Carpet Staples
Whether they're used to attach carpet to your stairs or hold carpet padding in place on your main floor, you're bound to come across carpet staples. While tedious, they are easily pried out using a few handheld tools.
Carefully slide a flathead screwdriver or a 6-in-1 painter's tool under each staple to lift it away from the floor. Then, pull it out using a pair of pliers. A heavy-duty staple remover makes the job even simpler.

“Pulling carpet staples out of hardwood is one of the most tedious DIYs we’ve ever completed! After several hours of fighting staples, we started researching tools and found an affordable, effective solution for removing carpet staples from hardwood."
Lora Green | Craftivity Designs
How to Remove Carpet From Concrete
Carpet tack strips are typically secured to the floor with concrete nails. To remove the nails, use a pry bar. Sometimes the nails are very long and can’t be pried out. In that case, use an angle grinder to cut the nails. If part of the nail is still visible, grind it down until the nail can’t be felt.
Then, remove any adhesive with a floor scraper and adhesive removers. Wear a respirator when using adhesive removers.
2. Roll Up Your Carpet in Strips
Use a utility knife to slice the carpet into strips that are a manageable size to roll up and move. In an average-size living room, you should be able to work well with carpet that’s rolled into thirds.
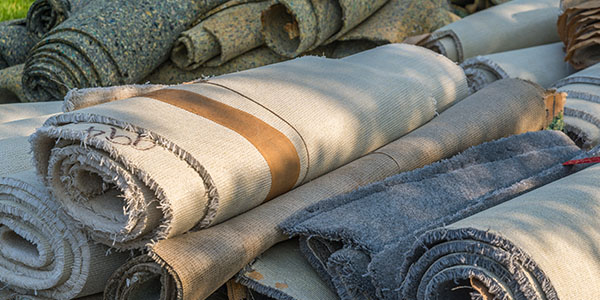
Roll a third of your carpet back into the center of the room. Use your utility knife to cut along the fold, keeping both hands on the blade for safety. Roll up your cut section of carpet, and use duct tape to prevent it from unrolling. This will make it a lot easier to pick up and drop at the curb or in your dumpster if you rented one for your project.
Continue rolling and cutting the rest of your carpet, making sure to cut off sections in separate areas, such as a closet or entryway. Come back to those after you’ve gotten the main portion rolled up and duct taped.

Carpet Removal Tip: If you plan to donate or reuse your carpet, keep in mind how much of the carpet you want to cut. You may only want to cut once or try pulling it up in one go.
Have lots of old carpet on your hands? Rent a dumpster to get rid of it.
3. Rip Up Carpet Padding
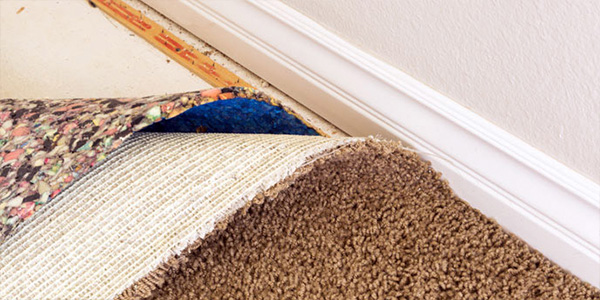
There are two parts to DIY carpet removal – removing the carpet and then tearing up the padding beneath it. Fortunately, most padding is stapled to the subfloor in patches, so you should be able to grab a seam and start ripping it up fairly easily.
Roll each section of padding up like you did while pulling up the carpet, duct-taping each one to keep them from unfolding. Make sure you wear gloves during this process to avoid pricking a finger on the staples.

Carpet Removal Tip: If your padding is glued down, you’ll need a hair dryer or heat gun and a floor scraper to separate it from the subfloor. You can find these at any home improvement store.
4. Remove Carpet Tack Strips if Needed
Carpet tack strips are narrow pieces of wood that line the room to help keep the carpet in place. They are covered in nails tack-side-up to grip the carpet backing. If you’re installing new carpeting and your existing tack strips are in good condition, you can skip this step entirely. If not, you’ll need your pry bar and hammer.
How to Remove Carpet Tack Strips
Before you begin removing your tack strips, check if they are held in place by screws or nails. If they’re secured using screws, you’ll want to unscrew them rather than using your pry bar to remove them. If they’re held in place by nails:
- Find the nails holding them to the floor and slide your pry bar underneath.
- Place a folded towel under the pry bar to protect the floor when lifting out the tack strips.
- Use the hammer to tap the pry bar deeper into the gap.
- Pull on the pry bar to loosen the strip until it’s free.
5. Check and Prepare Your Subfloor
Once the padding is gone, you can inspect your subfloor. This is an important step if you plan on installing new hardwood floors or tile. Any issues with the subfloor will be much harder to fix once the new flooring is in.
Here are some things to look out for:
- Rusted tack strips: While this could simply be a stain from a pet or spilled drink, it could also be a sign of a roof leak. If more than one tack strip is rusted, you should get a roof inspection ASAP.
- Squeaky subfloor panels: Walk and jump on each of your subfloor panels. If they squeak, hammer a few ring shank nails into the spot where the noise is coming from to secure the panel.
- Sinking floors: This could be a sign your foundation is cracking. If you notice sinking floors, have an inspection done before you install any new flooring.
- Staples: You will likely have a bunch of staples left behind from your carpet padding. Use a pair of pliers or your pry bar to take them out.
Wondering if it’s time to replace your subfloor? Learn more about the signs of damage and costs to replace it before moving forward with your new flooring.
Carpet Disposal or Reuse Options
If your carpet is still in good condition after removal, you may not want to just throw it away. Consider donating or reusing it. There are plenty of ways to get rid of your old carpet:
- For larger carpet removal projects, rent a dumpster for easy disposal.
- Find a carpet reclamation partner through Carpet America Recovery Effort (CARE) to recycle your carpeting.
- If your removed carpet is clean, consider donating it to an animal shelter. They’ll use old carpeting to line the bottom of cat and dog cages.
- Reuse the carpeting in a different room in your home. You can sew together pieces to create a new rug or flat mat.
- Call a junk removal service for another simple carpet disposal option.

