How to Finish an Attic

How to Convert Your Attic to Living Space
Are you looking to add more usable space to your home? Converting your attic is a great way to create a new livable room. With an attic remodel, you can add an extra bedroom to your home, create a new play area for your kids, or simply design a new storage area.
How Much Does an Attic Renovation Cost?
The cost to finish an attic is $4,600 to $16,400, with an average cost of $10,500. This comes out to about $30 to $60 per square foot. The total cost of your attic conversion will depend on the different elements your project needs.
Elements of Your Attic Remodel | Estimated Cost* |
|---|---|
Drywalling | $1,000 – $2,600 |
Insulation | $1,700 – $2,100 |
Electrical | $500 – $3,000 |
Subflooring | $500 – $800 |
Floor Joists | $1,000 – $10,000 |
HVAC Extension or New Mini-Split | $1,000 – $5,000 |
How to Finish Your Attic on a Budget
While we recommend working with a professional for tricky parts of your project like electrical wiring and HVAC installation, you can DIY as much of your remodel as you feel comfortable doing. Depending on the state of your attic, you can save on the following:
- If your attic has a ceiling and it’s in good shape, just adding a fresh coat of paint can spruce up the space.
- If adding ductwork or HVAC capacity is beyond your budget, other options include baseboard heating and mini-split systems.
- When furnishing your new room, repurpose items already in your home or head to a thrift store or garage sale to find unique pieces.
Spend Less and Convert Your Attic to a Storage Room
Are you looking to finish your attic for storage? Your attic conversion could cost as little as $300 if you just need to install a fan and tidy up the space to organize your household goods.
Depending on the state of your attic, you’ll still want to update your insulation and install a subfloor for easy access to your items, which will cost you less than $3,000. You can skip the plumbing, electrical work and decor, saving you on your total project cost.

“If you are finishing your attic with the intention of creating a large, temperature-controlled storage area, you’ll want to give considerable thought to what you want to store in the space. Extra storage in any home is wonderful, but you don’t want to find yourself … [in] a cycle of holding onto items just because you have the space. If the attic is temperature controlled, then you won’t be limited as to what you can store in the space (although be sure not to keep any flammable chemicals).”
Lauren Saltman, Professional Organizer and Owner, Living. Simplified.
Will an Attic Conversion Add Resale Value?
Are you upgrading your home to increase your return on investment (ROI)? Finishing your attic is a great way to add resale value. On average, an attic renovation has a 56% ROI. You can add an extra story to your home without building out a new floor.
4 Questions to Answer Before Finishing an Attic
1. Does Your Attic Meet Local Building Codes?
When converting your attic to living space, it’s important to note your attic must meet the same building requirements as the other rooms in your home. The attic needs to:
- Have at least 7 feet of vertical clearance in the majority of the room
- Be a minimum of 7 feet wide
- Have at least 70 square feet of space available
- Be accessible by a full-size staircase
- Have another exit in case of an emergency, typically an easily accessible window. Missing a window? Install a dormer for an easy fix!
If your attic is only accessible from a ladder or a pull-down staircase, you will need to build a permanent staircase before you can use it as anything more than storage space.
Do You Have Enough Room to Convert Your Attic into Living Space?
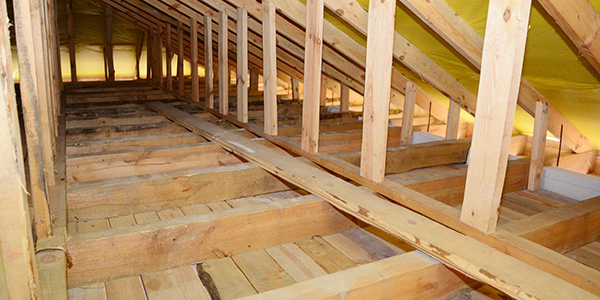
If your roof is supported by trusses, you will probably not have the space in your attic to build a room. A trussed roof is made up of beams in a triangular shape that take up a lot of attic space.
You would need to replace the trusses with horizontal steel beams or A-shaped trusses to create the space and ceiling height required by building codes. It is highly recommended that you contact an architect and an engineer to safely replace trusses.

“Trusses are engineered to distribute the roof’s weight evenly. They play a crucial role in the roof’s structural integrity, so altering them affects the roof’s stability. To create a habitable space, the common approach is to replace trusses with steel beams that take on the trusses’ load-bearing role. This change is significant and requires careful planning.”
The Loft Boys
*The Loft Boys are based in the United Kingdom, and therefore, may have different building requirements than the United States. Be sure to contact your local municipality and an engineer before attempting to replace trusses in your attic.
2. Do You Need a Building Permit to Finish an Attic?
Reach out to your local municipality to see if you need a permit for your attic remodel. A permit is usually only needed if:
- You are adding electrical wiring or ventilation
- You plan to change the structure of your home in the process, such as knocking down an existing wall or adding a dormer
3. Do You Need to Add Heating and Ventilation?
If your attic does not already have ductwork, you will need to find out if your current HVAC system can support an additional room. Bring in an expert to look at the capacity of your current heating and cooling system and find out if additional ductwork can be added to reach your attic.
Have the contractor check for or install rafter vents to keep air moving behind the insulation you will install to finish your attic. Rafter vents will keep your roof cool even while your attic is warm.
4. Can I Add a Bathroom to My Attic?
There are many benefits of adding a bathroom to your home, but you should consult a contractor to see if your attic can hold one. Most attics can only hold what is known as “dead weight,” which means some storage and light traffic.
To add a bathroom, your attic will need to hold “live weight,” the total weight of furniture, flooring, people and other items. Your ceiling joists will need to be strengthened to hold bathroom flooring, a tub and a toilet.
If you add a bathroom, be sure to position it above your kitchen or another bathroom. This makes it easier to connect to the already existing plumbing in your home.

“Plumbing is a primary challenge; you need to ensure the existing system can handle the additional bathroom and that waste can be effectively drained. This might involve installing a macerator or a pump if the attic is above the main soil pipe. Bathrooms also need adequate ventilation to prevent moisture build-up. The weight of a bathroom, especially with fixtures like a bath, can be significant, so ensure the attic’s floor joists can support this. If your home’s water pressure is low, you might need a pump or specific fixtures for the attic bathroom.”
The Loft Boys
Your new bathroom will likely be smaller than the others in your home, so check out our small bathroom storage ideas to help you organize your new addition.
How to Finish an Attic Step by Step
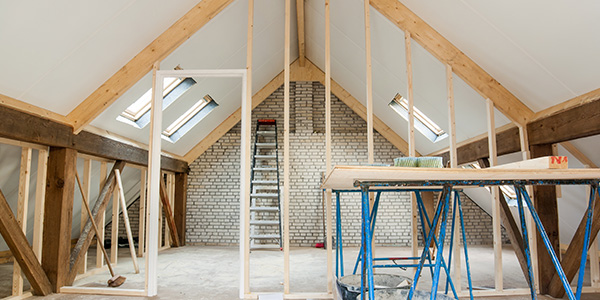
Now, how do you make a room in the attic? If this is your first remodel, consider hiring a professional to help you with your attic conversion. If not, or you’re a confident DIYer, follow these nine steps to finishing an attic.
1. Clean Out Your Attic
Before you begin your renovation, you’ll want to declutter your attic. Start by throwing away old junk and insulation. If the insulation is loose or blown in, use an industrial vacuum to remove it. You can install subflooring over your current insulation if it’s in good condition. If it is old and compressed, consider replacing it.
2. Wire the Attic for Electricity
Once your attic is brought up to code and you have a permit, hire a licensed electrician to ensure all wiring meets code requirements. We recommend hiring a professional to avoid the risk of an electrical fire.
As a rule of thumb, there should be at least one outlet on each wall and at least one outlet every 12 feet.
3. Add Plumbing
If you’re adding a bathroom to your attic, you’ll need to install plumbing next. Again, unless you’re an experienced plumber yourself, you should hire a professional to ensure your project goes smoothly and you don’t run into any issues, like drainage problems, in the future.
4. Build a Subfloor
If joists are visible on the floor of your attic, you will need to build a subfloor. Add insulation under your subfloor to reduce the sound traveling between your attic and the rest of your home. To make sure you have enough space for your insulation, you need to install a riser of two-by-fours over the existing joists.
- Be sure to lay the new joists for the riser perpendicular to the existing joists in your attic.
- Each new joist should be 16 inches apart.
- Screw each new joist into the existing joists, being careful to avoid any electrical wiring.
- Cap off each end of the subfloor with two-by-fours. At this point, your attic floor should look like a grid.
- Place the new insulation in between the subfloor joists.

Pro Tip
Use screws instead of nails. If you use nails, the shock and vibration of nailing into the joists will crack the drywall ceiling.
Next, you’ll need to lay down plywood to finish up your subfloor.
- Get 1/2-inch thick plywood to cover your attic floor.
- Fix the plywood to the subfloor by screwing in each corner of the plywood.
- Once you’ve covered your floor with plywood, place screws 16 inches apart to secure the plywood to the subfloor.
5. Insulate Your Attic
For a DIY project, the best insulation for an attic is batt insulation with a vapor-retardant facing. This insulation is great for finishing an attic because it is flexible, easy to install, and can even be layered for additional coverage. Before installing the batts, caulk any spaces or leaks where air can pass to the rooms below.
Batt insulation is usually cut to fit between standard wall joists and 8-foot-high walls. Attic walls are not always this tall. If the batts don’t fit, trim pieces with a utility knife.
- Push insulation into the space between joists with the vapor barrier facing you — not the wall. Try not to squish or compress the insulation. This can reduce its ability to insulate your attic.
- Staple the insulation into the joists. The insulation manufacturer may have offered specific instructions on how to do this.
- Continue the process on all attic walls and on the ceiling.
- If you need to insulate behind pipes or electrical wiring, peel the insulation apart, create two layers, and fit the layers around the obstacle. Again, make sure the vapor barrier is facing you, not the wall.

“When thinking about a loft conversion, proper insulation is paramount. It’s not just about keeping the space warm in winter and cool in summer; it’s also about energy efficiency. As heat rises, a poorly insulated loft can be a significant source of heat loss, leading to increased energy bills.”
The Loft Boys
6. Install Walls and Ceiling
Once you’ve finished installing the insulation, it’s time to finish your walls. Hang drywall horizontally from your exposed studs and secure with drywall screws. Finish by covering seams and screws with drywall mud.
If you’re looking to add more decorative flair to your walls, consider installing beadboard instead of drywall.
Depending on the height of your roof, you may be able to choose a dropped ceiling for a more finished look, but if you need to conserve space to meet building code standards, install drywall directly to the roof to create your ceiling as well.
7. Install Lighting and a Fan
Adding skylights or dormers to your attic is a great way to introduce natural light into your space. But if these additions aren’t in your budget, and you don’t need to add a dormer to meet building code requirements, there are many other ways to light up your space. You can:
- Add a light fixture
- Position lamps around the room
- Use LED strips
- Hang holiday lights
You may also want to install a ceiling fan, but it’ll depend on the height of your attic. Consult with a professional to see if it’s possible to add to your attic.

“One of the joys of a loft conversion is the opportunity to introduce a lot of natural light into the space. By incorporating skylights or dormer windows, you can make the room feel more spacious and welcoming. The positioning and size of these windows can be optimized to not only maximize light but also to potentially offer fantastic views, depending on your property’s location.”
The Loft Boys
8. Paint Attic Ceiling and Walls
Next, paint your drywall. New drywall will need to be primed prior to painting. After priming, add at least two coats of paint to give the drywall a finished appearance. If you used drywall on the ceiling, paint it before starting on the walls.
When choosing paint colors for your attic room, consider lighter options, especially if the room has few windows and little natural light.
9. Choose and Install Attic Flooring
You’re almost finished with your attic remodel! Your next step is to choose flooring for the room. Installing carpeting is a good option for an attic because it helps absorb sound and adds additional insulation to your floor. Follow installation guidelines based on the flooring of your choice.
Ideas for Your Finished Attic
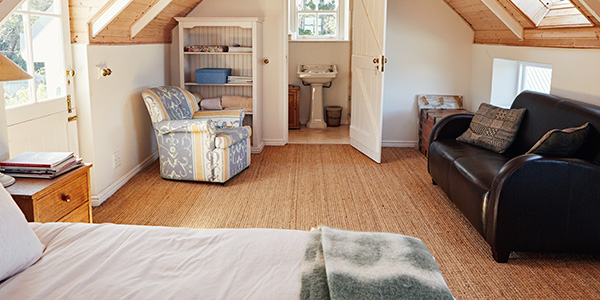
Now that you’ve converted your attic to living space, what can you do with it? There are many ways you can use and decorate your new room. Check out the following finished attic ideas:
- Bedroom: Converting your attic to a bedroom is a great way to create a guest suite.
- Office: Add a home office in your attic for a quieter space to have your meetings.
- Playroom: Organize a playroom, so your kids’ toys have a permanent home.
- Storage room: Add shelves and use your attic for storing household items when you don’t need them out and about.
- Walk-in closet: Need a bigger space to store your wardrobe? Use your attic as a walk-in closet.

“Turn the area into a family room or game room (especially popular with the teens!). Having a fun place, with a gaming system and an area for snacks and drinks, will make your house popular for your children and their friends.”
Lauren Saltman, Professional Organizer and Owner, Living. Simplified.

