How to Finish a Basement From Floor to Ceiling

How to Finish a Basement
While concrete floors and walls may not scream potential right now, your basement offers a lot of space that can be used for more than just storage and can add a considerable amount of value to your home. If a finished basement is on your home wish list, take some time to learn about what goes into the project and find out if a DIY finished basement is right for you.
The basic steps to finish your basement include insulating walls, choosing flooring and adding a ceiling to transform your lower level into an additional living area.
Ready to get started? We advise reviewing all the steps and calculating your budget before beginning this project. If you aren’t experienced at home renovations or if you have several obstructions in your basement, hire a professional for this project.

What’s the biggest challenge in finishing a basement?
"Typically, the biggest challenge is working around obstructions. There are heating ducts, plumbing drains, water pipes, gas lines and electrical wires that are all off and hung below the floor joist. Designing around these things is the biggest challenge, making the basement look good and feel right. A professional design-build company will be able to help you achieve the results that you want, whether it is doing this in the most inexpensive way possible, or spending more money to make it look beautiful and turning those obstructions into integrated design features."
Abe Degnan, Degnan Design-Build-Remodel
What to Do Before You Start Renovating Your Basement
Before you begin buying insulation and framing walls for your basement remodel, get your basement ready for the investment by cleaning it out and ensuring your basement doesn’t have any active leaks and that it is up to code.
1. Clean Out Your Basement
Before you begin your DIY project, or bring in experts, you need to remove all the junk from your basement. Clear away all the boxes, bins, trash and appliances before getting started.
Rent a Dumpster to Toss the Clutter
2. Complete a Moisture Test in the Basement
It’s a great idea to perform a moisture test to find out if you need to waterproof your basement before remodeling. If not, your basement renovation could be ruined by sneaky leaks.

“Identify where the source of the moisture is and fix it. Do you have wet soil underneath and need drain tile? Are there cracks in the foundation? Identify the root cause by consulting with a professional remodeler or a dry basement expert in order to solve your problems before finishing the basement.”
Abe Degnan, Degnan Design-Build-Remodel
Here are some quick ways to waterproof your basement:
- Redirect downspouts away from your foundation.
- Regrade the slope of your lawn to drain water away from the basement.
- Use waterproof coating or paint on the interior walls.
- Add a drain that leads to the storm drain or a pit with a sump pump.
Once you’ve addressed the leaking walls, complete the test again to verify you’ve fixed the issue and then you’re ready to get started.

Pro Tip for Finishing Your Basement
Even if you don’t have a problem with leaking walls, consider adding a coat of waterproofing membrane to exterior cement walls before you move forward. This will help prevent future issues.
3. Research Local Building Permits and Building Codes for Basements
You will need to apply for the appropriate building permits when you start working on your basement. Before you do that, research local building codes to find if there are rules about the ceiling height and the number of exits required for your basement. If your basement doesn’t meet these requirements, you may need to rethink a DIY approach to finishing your basement.
Once you know your basement meets the appropriate codes, apply for your permits and get to work finishing your basement.
4. Gather Materials and Tools
The Tools You'll Need
- Caulk gun
- Masonry drill and bits
- Safety glasses
- Sawhorses
- Utility knife
- Circular saw
- Dust mask
- Hammer
- Stepladder
- Framing nailer or nail gun
- Hearing protection
- Level
- Tape measure
- Drywall jack
The Materials You'll Need
- Foamboard adhesive
- Caulk or foam filler
- Framing nails
- Ceiling Tiles (if desired)
- Shims
- Polystyrene foam insulation
- Two-by-four boards, enough to frame all exterior walls
- Wall screws
- Flooring of your choice
- Plywood
- Duct tape
- Cement Nails
- Drywall
- Wire and wire cutters
The amount of materials required will vary based on the size of your project and the finishes you choose to use. Measure your basement before purchasing materials. Keep in mind the insulation will be needed for the walls and the floor if you build a subfloor. Drywall can be used on the ceiling as well as the walls if desired.
Steps to Finishing Your Basement
How to Finish the Basement Walls
If the walls of your basement are nothing more than bare concrete, you need to start here. Finished basement walls will not only make the space look complete, but also warm and inviting – especially once insulation is added and the drywall is painted.
Here are the steps to take to finish your basement walls:
1. Install Insulation
One of the easiest and most effective ways to insulate a basement’s exterior walls is adding polystyrene foam insulation directly to your foundation walls.
- Cut the pieces of foam to the height of your ceiling minus 1/4 inch to allow some wiggle room during installation. You can cut foam insulation using a utility knife or a circular saw. If you use a saw, wear safety goggles.
- Hold your cut insulation against the wall to ensure it is the right height. Remove again before moving to the next step.
- Apply the adhesive in an S shape to the wall where the foam will attach. Let sit for 30 seconds or the amount of time indicated on the bottle.
- Press the sheet into place against the adhesive.
- Repeat the process until you have covered all walls.
- Once all the foam is installed, seal the seams between each piece with duct tape.
- Finally, seal any gaps between the foam and the ceiling, floor and corners with caulk or foam-filler.
Once your installation is installed, you’re ready to frame your walls and install drywall.
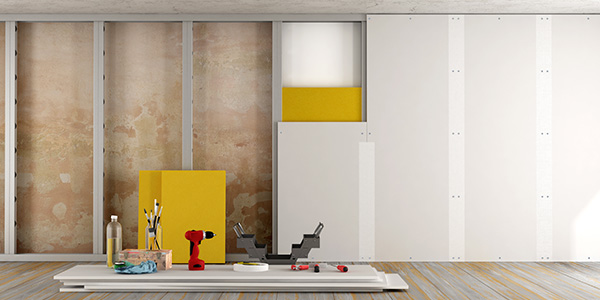
2. Frame Your Walls
Before you begin building your walls, cut all your two-by-fours to the correct length. For the vertical wall joists, subtract the thickness of the top and bottom plates as well as an additional 1/4 inch. This will give you enough space to fit the frames easily against the foundation.
To frame a basement wall:
- For the walls that run parallel to your floor joists, install blocking between the overhead joists and the wall by screwing or nailing a fitted two-by-four to the joists. Install every 2 feet along the parallel walls. You will use these blocks to attach your frames.
- Draw a line the length of each wall that is 4 inches from the wall. This is where you will align the outer edge of the frame.
- Assemble the wall on the ground with the bottom plate nearest to the wall. Attach the wall joists to the top and bottom plates every 16 inches using a framing nailer. Move wall joists as needed to account for doors and windows.
- Tip the wall up and match the outer edge of the bottom plate to the 4-inch line.
- Attach the bottom plate to the concrete floor using a masonry drill, masonry nails and a hammer. Wear hearing protection, dusk mask and safety goggles during this step.
- Attach top plate to the above joists or blocks using your framing nailer and a stepladder. As you move across the wall, hold a level vertically against each wall joist before nailing the top plate above to ensure the wall is sitting flat. If your wall is not level, insert a shim between the top plate and ceiling joists until the wall joists are level and then use the framing nailer to attach it.

Pro Tip for Finishing Your Basement
The wall joists need to be placed every 16 inches on center, meaning the 16-inch mark must be in the middle of the joist. Most tape measures have red markings every 16 inches, indicating where studs should be placed when framing a wall. Wherever you see these marks, mark an "X" 3/4 inches back from the mark, on both the top and bottom plates so you know right where to place the edge of your 1 1/2-inch-thick wall joist.
If your basement doesn’t allow for you to build the wall on the ground and tip it up, or you are completing the project without a second pair of hands, you can always install the top plate and the bottom plates first and then secure the wall joists.
3. Install Drywall
After building your walls, you can begin hanging your drywall. Take into account any outlets or valves by measuring their placement and cutting access holes into the drywall sheet using a drywall knife. For windows, measure out the dimensions and cut the appropriate shape out of the drywall only after you’ve secured the sheet to the wall.
You can choose to hang your drywall vertically or horizontally, though for most homes hanging drywall horizontally is the way to go. You’ll have fewer seams and have an easier time finishing each panel.
To get started:
- Measure to ensure each piece of drywall will end on a stud and trim where needed using your utility knife.
- Secure the drywall to each stud using drywall screws and a drill, making sure not to tear the drywall paper surface. You shouldn’t see any plaster around the nail head.
- Cover seams and screw heads with caulk. Finally, cover seams with drywall tape and then repeat the caulking process.
Now your finished basement walls are ready for paint.
How to Finish the Basement Floor
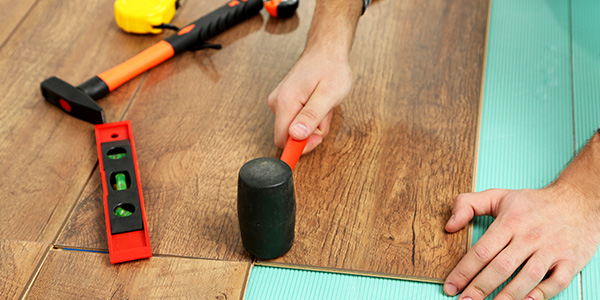
After the basement walls are finished, it’s time to turn your attention to finishing your basement floors. For flooring, it’s best to use waterproof materials to prevent damage from the inevitable flood or leak that may occur in any basement.

"Basements have different flooring needs than other rooms in the home because this room is likely the most water and flood prone. The best basement floors will be waterproof or water-resistant. But another fun thing about the basement compared to other rooms of the house is that it can be used for a variety of things, from home gyms to playrooms or offices. There are all kinds of things you can do with flooring in these kinds of rooms, but you’ll still want a waterproof floor no matter how you intend to use your basement."
Michelle Barichello, Flooring Inc.
1. Choose a New Flooring for Your Finished Basement
Here are some popular basement flooring options to consider:
Vinyl | You can choose vinyl flooring that looks like wood planks. It’s easy to install and is basically water-resistant. |
Tiles | Tiles will make it easy to clean up if you do have a flood or leak and will give your basement a polished look. |
Carpet | Carpet tiles can be installed easily and, if you do encounter water issues, they can be lifted up and dried out or replaced inexpensively. |
Once you’ve chosen the right flooring for basement remodeling project, learn how to install flooring and subflooring.

What is the best flooring for a basement cement floor?
While any waterproof flooring is a good option for a basement, our experts suggest choosing vinyl flooring:
"Waterproof vinyl is one of the best floors for basements that get water because it is durable and comes in beautiful, realistic wood looks. If you use your basement as a living space or you have a laundry room or office down there, waterproof vinyl gives your room an upscale aesthetic while serving as a functional floor in this water-prone area."
Michelle Barichello, Flooring Inc.
2. Install Subflooring and Flooring
If you are using flooring that snaps together, you can install directly onto the concrete subfloor, as long as the subfloor is level and moisture-free. However, it’s a better idea to build a new subfloor using plywood and polystyrene sheets, or at the very least will require installing a moisture barrier.
Installing a new basement subfloor as your first step to finishing your basement floor:
- Lay down sheets of polystryene insulation using adhesive in the same fashion you used when insulating the walls.
- On top of the insulation, lay plywood sheets. Secure the new subfloor using your masonry drill and concrete screws.
- After the plywood is installed, you can use it as a base for installing virtually any kind of flooring you’d like.
Next, follow the installation instructions that are specific to your type of flooring. With flooring and drywall installed, your remodeled basement should start taking shape.
How to Finish Your Basement Ceiling
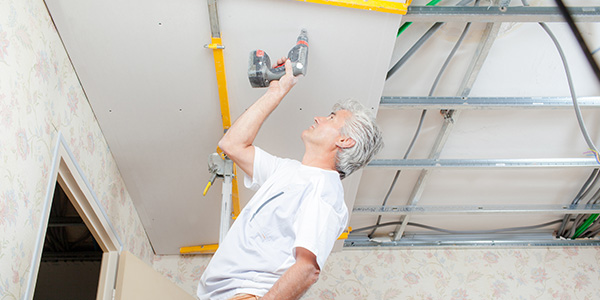
For a finished look in your basement, you’ll need to hide the wires, vents and pipes that are visible on your basement ceiling, while still allowing access to them as needed. Use the steps below to choose your materials and install the ceiling of your choice.
1. Choose Your Ceiling Type
While you can simply paint your basement ceiling to help blend in pipes and utilities while leaving them accessible, installing a finished ceiling will give your renovated basement a more complete look.
When it comes to finishing your basement ceiling, there are two types that can be installed:
- Drop-Ceiling: A drop-ceiling is the cheap and easy option that you’ll find in a lot of homes. It accomplishes the job of covering exposed pipes and floor joists while still allowing access to overhead utilities.
- Drywall Ceiling: Drywall makes for a finished looking ceiling that is better for conserving space, but will require some additional work to allow access to pipes and ductwork.

Pro Tip for Finishing Your Basement
If your ceiling already feels a little low, painting or installing drywall will help you conserve more space than installing a drop-ceiling.
2. Install Your Ceiling
For a tile ceiling, installation will require a hammer, nails, wire, wire cutters and an installation kit. From there, it’s just a matter of following the instructions included with by the manufacturer. With a drop ceiling, you can replace damaged tiles as needed.
For a drywall ceiling, you will need a drywall jack or an extra set of hands. Otherwise, you’ll be following roughly the same process as finishing your basement walls. You will also need to leave an access hole in the drywall for future access to pipes and ventilation. Cover it with an air grate for a finished look.

