Bathroom Safety Tips for Seniors Aging in Place

Project Overview
Senior Bathroom Makeover Ideas
Most slips and falls happen in the bathroom, making it the most hazardous room in your house for elders. Whether you want to protect a loved one or prepare for your own aging in place, it’s essential to start with senior bathroom safety modifications.
Elderly Bathroom Safety Upgrades: What to Expect
Remodeling a bathroom takes time, effort and money, but it’s a great investment for people planning to age in place. Before you start, think about the needs of the user and what changes will be most effective. Some seniors will feel comfortable with a few minor upgrades, while others will require a thorough renovation.

“A big renovation isn’t always necessary to decrease fall risk, which is good news to many who can’t afford it (although some healthcare policies may cover modifications depending on the situation, like a recent surgery). The most important areas to remodel depend on a person’s specific needs. It’s always important to get the user’s input to understand the issues and how to solve them.”
Nicole Hernandez | AgingInPlace.com
If a complete senior bathroom makeover is necessary, you may want to consider hiring a professional. While it may cost more, home remodelers will take the labor off your hands and help with accessibility details. If you are completing a full revamp, consider renting a dumpster to dispose of everything at once.
Need some ideas on making bathrooms safer for the elderly? Here are our top suggestions.
How to Improve Bathroom Safety in 8 Steps
1. Brighten the Room With New Lights
Poor lighting reduces depth perception and makes the bathroom difficult to navigate. It can even lead to falls. However, it’s easy to combat this by installing lights that boost visibility and accessibility. This is an important part of improving shower safety for seniors.

“Without enough light in the room, it's very easy for many older adults to trip and/or misjudge the spaces around them. So, a good and bright lighting in the bathroom is very important.”
Esther C. Kane, C.D.S. | SeniorSafetyAdvice.com
The best lighting option depends on the size of your bathroom. We recommend adding multiple light fixtures so all areas of the bathroom are lit. This can include installing wall lights on both sides of the mirror.
Once you decide which light fixtures are best, use complimentary bulbs. LED bulbs last longer and do not contain mercury like fluorescent bulbs. Frosted lights are a popular lighting option in bathrooms because they can reduce glare. Ultimately, choose lights that will brighten the environment, improve bathroom safety and help older residents feel comfortable.
Make Sure the Shower Is Lit
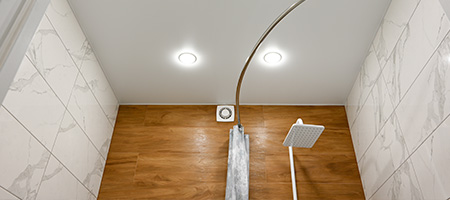
The National Library of Medicine reports bathroom injuries among seniors occur most frequently when getting in or out of the tub or shower. One way to improve shower safety for seniors and prevent falls is to make sure the area is well lit. Waterproof recessed lights are the most common way to add lighting to a shower. Install fixtures that are moisture-resistant and wet-rated.
If your existing shower has an adequate fixture size, you can often replace the fixture or bulbs with ease. However, adding recessed lighting from scratch will require professional help. Most electricians charge around $300 per fixture to install.
Use Automatic Night Lights
Night lights are a simple way to illuminate a room or hallway without causing eyestrain. These small lights can easily be plugged into the wall. Sensor night lights automatically shine in a dark area, so you won’t have to remember to turn them on before bedtime. This bathroom safety tip prevents tripping on your way to the bathroom in the middle of the night.
2. Upgrade Your Shower
Trade Your Tub for a Walk-In Shower
Bathtubs are difficult to get in and out of, especially as aging hinders balance and mobility. Since they’re a considerable source of trips and slips, shower modifications for the elderly are essential.
Converting a tub to a walk-in shower makes bathing much easier to manage. A walk-in tub is another accessible option that comes with a door and low step threshold. However, users have to enter the tub before filling it and wait until it’s drained before exiting.

“A zero-barrier shower, or curbless shower, does not have any threshold but is instead level with the main floor of the bathroom. This allows a smooth transition and the ability to use the shower independently, for longer. When remodeling a shower, it is recommended to allow enough room and turnaround space for any personal equipment – i.e., shower chair, commode chair, wheelchair – to be used in the space, whether it is needed now or down the road.”
Lori Bellport | Live in Place Designs
Include a Shower Seat
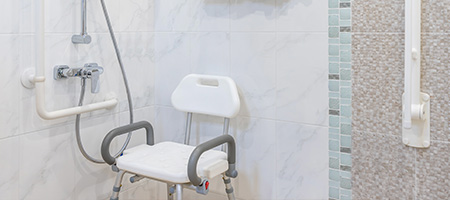
Adding a shower seat gives the user an option to sit down, improving shower safety for seniors. Someone using a wheelchair or walker can use the seat to avoid standing too long.
Built-in benches are a common shower seating option. Installing them along the wall allows a user to slide into the shower. Adding a bench to an existing shower is possible, but consider buying a shower kit with a bench already built-in if you’re converting from a tub. This can save labor and money. Though they can take up more room, benches are convenient and sturdy.
A simple shower chair is an inexpensive and portable seating option. It’s an ideal choice for existing showers. There are numerous customizations for these types of seats, from material to shape and size. Modify your selection to the user’s preference.
Install Grab Bars
Grab bars give seniors extra security and help them move around the shower, so you shouldn’t skip this shower modification for the elderly. Take some time to consider where to add them and which installation position would be most valuable to the user. Vertical installation in the front of the shower can help with entering and exiting. Horizontal installation provides support over a larger area. Diagonal installation near a shower seat can assist with sitting.
Ensure the grab bar you choose is durable. This usually requires traditional installation with a drill, but there are ADA-approved no drill grab bars. Most homeowners spend between $85 and $300 on shower grab bar installation.


“Grab bars can be installed at bath/shower entries, inside the bath/shower, or next to the toilet to help stabilize anyone using these facilities. Their placement is often up to the primary user. They should be placed in positions that are natural to them. People should never use the towel rack as a grab bar, as they often come loose from the wall and cause falls.”
Nicole Hernandez | AgingInPlace.com
Shower Grab Bar Installation Guidelines
Once you pick the best place for your grab bar, use a stud finder to locate a stud behind the wall. You may run into difficulty if you’re searching behind a tiled wall. In this case, locate the studs in the adjacent room and transfer the measurements to the tile.
Use the mounting flange as a guide to mark your pilot holes. Once set, drill the pilot holes through the drywall. Remember to use tile drill bits if that’s what you’re drilling through. Use a ¼ inch drill bit to drill through the tile and drywall, but don’t touch the stud.
Drive in the mounting screws that came with your grab bar. Don’t overtighten the screws to prevent cracking. Pull on the bar to check that it’s secure.
If you are completing a full senior bathroom makeover, consider blocking the walls ahead of time. Blocking is applying a piece of wood between the stud walls. This gives your walls larger anchor points that make shower grab bar installation easier.

“The single most important thing to know about grab bars is that they are only as strong as the strength of the material to which they are mounted. This is why it is important to have appropriate blocking in the walls in any locations where grab bars may be anticipated. And by planning for blocking during your bathroom design process you can allow yourself the flexibility to adjust grab bar placement at any time and also prevent the added expense of a construction re-do down the road!”
Lori Bellport | Live in Place Designs
Install a Hand-Held Shower Head
Hand-held shower heads mount in the same spot as a conventional shower head, but have a hose that you can hold in your hand. This makes showers effective and eliminates unnecessary movements, enhancing shower safety for seniors. They can be used while sitting down and even help caregivers assist with bathing.
3. Raise Toilet Seat
Getting on and off the toilet can be difficult as you age. Raising the toilet height makes it painless to stand up, improving senior bathroom safety. While you can replace your current toilet with a raised-height toilet, toilet risers are cheaper and easier to install.
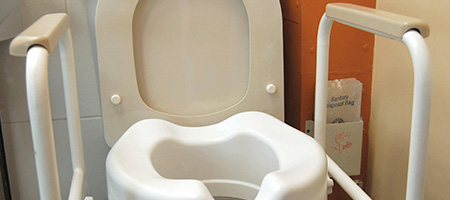

“Toilet risers increase the height of the toilet rim to decrease effort when sitting down or standing up. Toilet risers are generally helpful for those with lower body weakness or who are recovering from hip or knee surgery, which makes squatting uncomfortable or difficult. For some, this is only a temporary modification during recovery. For others, this is a permanent fixture to reduce fall risk.”
Nicole Hernandez | AgingInPlace.com
How to Install a Toilet Riser
A typical toilet seat riser will cost around $50. Make sure to choose a size that fits your toilet.
The installation process starts by removing your current toilet seat. Next, install the clips provided with your riser. Place the riser on top of the bowl and align the clips. Push it down until it locks into place.
Remove the hinges from your old toilet seat and lid. To finish, screw in the new toilet seat lid.
4. Reduce Clutter
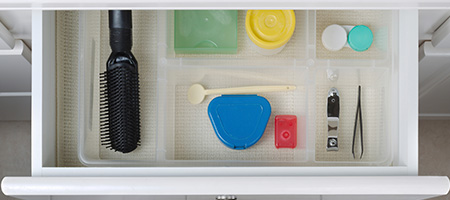
Clutter can make it difficult to navigate the bathroom and lead to needless bending. This is especially difficult in small bathrooms, but the right storage solutions can effectively resolve the issue.

“An accessible vanity with a roll-under sink (or the ability to adapt it to a roll-under when needed!) and storage that can be reached with ease and safety will promote safety and independence. The various elements – shower/vanity/toilet/storage - arranged and spaced for full functionality, in a well-thought-out design is the best way to be certain your bathroom will be comfortable, safe, and functional for now and the future.”
Lori Bellport | Live in Place Designs
Other than daily items, keep the sink clear. Place all other items on racks and in drawer organizers. This will keep things orderly and accessible.
Consider installing soap and shampoo dispensers. They will reduce the number of bottles in the shower so seniors won’t have to bend as much.

“Having items that are most often used readily available but in such a way to keep the area clean and organized can help to keep anyone safer.”
Esther C. Kane, C.D.S. | SeniorSafetyAdvice.com
5. Use Nonslip Mats
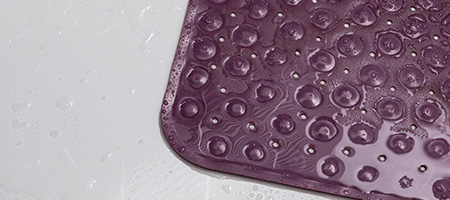
Many bathroom mats slide when stepped on. Replace these mats with rubber non-slip mats, in and outside of the shower. If you or your elderly relative use a walker, get a thin mat that won’t obstruct its movement.
6. Replace Round Faucets With Levers
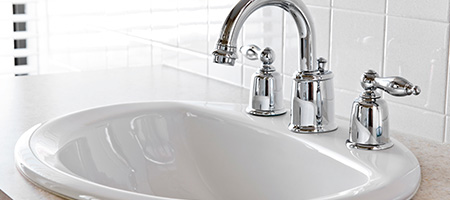
Round faucet knobs are especially difficult to turn for those with limited dexterity and strength. Replace both your tub and sink faucets if they are round. Seniors with arthritis and other joint pain will benefit from lever faucets.
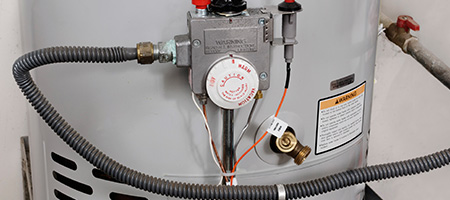
7. Lower the Water Heater Thermostat
If water is too hot, it can cause serious burns and even cardiovascular strain. You can adjust your water heater thermostat to ensure the water temperature coming out of the faucets is not scalding. The temperature should be less than 120 degrees Fahrenheit.
8. Keep a Medical Alert Button Nearby
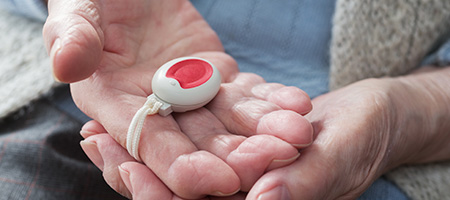
Even with elderly bathroom safety modifications, accidents are still possible. In the case of a fall, medical alert buttons make it easy to call for help.
Home medical alert systems use a combination of help buttons and speakerphones to let the user quickly call for emergency assistance. Medical alert smartwatches are another option that can use a cellular connection to place emergency calls wherever you are. Choose an accessible option that gives you the most peace of mind.
