How to Remove Shingles: A Step-By-Step Guide

How to Remove Shingles
Periodically removing shingles and replacing them is necessary to extend the life of your roof and protect your home from water damage. But let’s be honest – replacing shingles isn’t the cheapest home repair. However, it’s worth every penny to avoid the large expense of a full reroofing project, and removing the shingles yourself can make the job more affordable.
Wondering exactly how to remove shingles? It’s hard work, but manageable when you have the right tools, experience, planning and assistance. We’ve laid out the shingle removal process in a step-by-step guide that anyone can follow.
When Do You Need to Replace Roof Shingles?
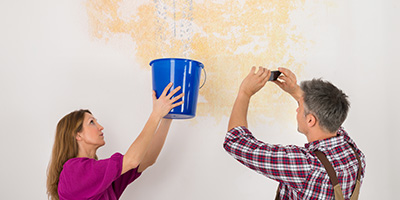
Unless you’re seeing water damage inside your house, it can be tough to tell when you need to replace your roof’s shingles. There are, however, a few tell-tale signs to look out for.
Signs It’s Time to Replace Your Roof Shingles:
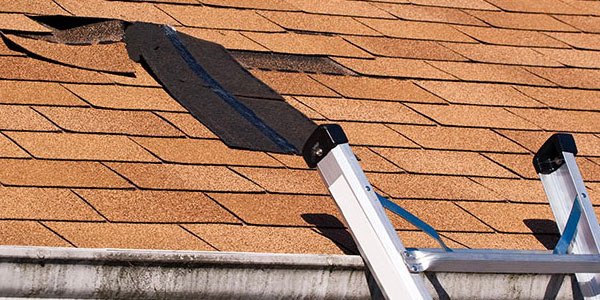
- The edges of shingles are starting to curl up.
- Moss or algae are building up on the roof’s surface.
- Asphalt granules from shingles are in your gutters.
- Your roof is more than 20 years old.

“Not everyone should attempt to replace the shingles on their roof. Climbing up on the roof can be dangerous if you do not know what you are doing and are not careful. If you are determined to repair isolated spots of damage to shingles on the roof yourself, proceed with caution.
- Firmly nail replacement shingles to the roof decking, preferably not in the exact same nail hole as the removed shingle.
- Address any damage to the underlying felt or plywood decking.
- Secure new shingles to the ones above and underneath them with asphalt mastic.
Always consult an expert roofing professional if you feel out of your depth with a roofing repair or if you are worried that the problems can extend beyond what you see. Ignoring issues can create huge problems down the road. Using a free service such as ServiceWhale, you can find an experienced roofing contractor to evaluate your roof and perform the needed repairs in order to maintain your home’s integrity and value.”
ServiceWhale Team
The Average Cost to Tear Off and Replace a Roof
There’s no question that the cost to tear off your roof and replace roof shingles is a solid investment. However, the cost to replace a roof depends largely on the type of material you use and how large your house is.
According to DaVinci Roofscapes and This Old House, pricing for roofing materials ranges from $50-70 per square for concrete, to about $100 per square for asphalt, all the way to $400-600 per square for slate.

The average price across America to roof a mid-sized house is around $9,500, which has gone up steadily in the past several years. However, it’s not odd anymore to see a new roof costing $100k if an expensive shingle, slate or synthetic material is chosen.
Chris Spacek | West Side Roofing Co.
Cost to Demo a Roof
When replacing shingles, you must remove the old shingles and prep the roof before installing the new shingles. The first phase of this process typically costs an average of $1,000 – $3,000 for a roofing contractor to remove old shingles.
We recommend hiring professionals to handle the installation part, but if you’re looking to save on labor costs, you can consider removing the shingles yourself. While not recommended (or safe) for inexperienced individuals, most homeowners can expect to save a few thousand on roof demo costs by DIYing the shingle removal.

Pro Tip
Choosing to install new shingles over existing shingles is an extremely common choice in the DIY roofing game. The reason: it’s cheaper and a lot less work. But despite the upfront savings on money and time, shingling over an existing roof is almost always a poor choice. In most areas, code requirements dictate that there can’t be more than two layers of shingles on a roof. Also, if leaks develop in the future, they can be very hard to find and fix when you’re dealing with multiple shingle layers.
The obvious fix for this mistake is to bite the bullet and remove your current layer of shingles before installing the new layer.
Phase 1: Steps to Prepare for Your Roof Shingle Removal
1. Decide When You’re Removing Your Roof Shingles
It’s important to set a firm date for your shingle removal for two reasons. First, it’s essential to lay new shingles as soon as possible after removing the old ones to prevent damage to your bare roof. So before you start, you’ll need to tell your roofer when to be there. Second, you’ll need a firm date to make sure you have other experienced people available to assist you in tearing off the roof shingles.
2. Hire a Professional to Lay the New Shingles
Before you tear off the old roof shingles, you need to know whether you or a professional will be installing the new shingles. Again, we recommend going with a professional to make sure the job is done right, but ultimately, it’s up to you.
If you’re hiring a roofing professional, the National Roofing Contractors Association is a great place to find qualified roofing contractors in your area. Angie’s List also shares some helpful tips for choosing a roofing contractor.
3. Gather Your Roof Tear Off Crew
A small group of about four or five people can remove an entire roof’s worth of shingles in a day if you get an early start and have planned everything out thoroughly ahead of time. Just make sure all the friends, neighbors or family members you ask understand the hard work involved and how to perform their part in the process safely. Don’t forget to be a good host—treat these good Samaritans to some pizza for all their help the day of the project!
4. Obtain Any Necessary Permits
Depending on your location and the size of the job, you may need to get a permit before moving forward with your shingle removal project. Check with your city office to understand the requirements in your area. If a permit is required, getting it is usually a simple matter of going down to the city office with your plans for the project, having the plans looked over and paying the permit fee.
5. Have a Disposal Plan for Your Shingles
Before you get to work, you’ll want to make sure you have an easy way to dispose of your old shingles and roofing debris. Without one, you’ll be left with a major cleanup job at the end of an already long day.
There are a number of disposal solutions available, but renting a dumpster for shingles is the most convenient. You’ll be able to rent the container for the entire length of your project, and you and your contractor won’t have to make multiple trips to the landfill, which saves time and money. The most common size for roofing projects is a 20 yard dumpster.
6. Assemble the Items on Your Roofing Materials List
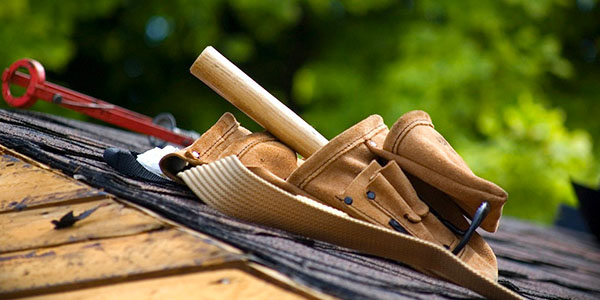
Now it’s time to collect the tools you’ll need to complete your roof work. Most of these should be available in your local home improvement store, but you can also order equipment online if needed.
Shingle Removal Tools You’ll Need:
- Sturdy ladders
- Hammer (one per person)
- Hammer tacker (at least two)
- Roofing nails
- Staples
- Plywood sheets (enough to lean against roof jacks, plus several extra)
- Pry bar (at least two)
- Adjustable roof jacks (several)
- Chalk line
- Tarps (several)
- Garden fork and/or roofing shovel (one per person)
- Push brooms (at least two)
Additional Materials You’ll Need:
- #30 Roofing felt
- Ice and water barrier
7. Suit Up
Wear thick-soled shoes or boots with good grip to keep from slipping while moving around on the roof. Roofs get very hot, even on relatively mild summer days, so wear long pants and work gloves to protect your skin. Because removing shingles will cause them to shed granules, you should also wear goggles to protect your eyes. And of course, a safety harness is highly recommended when working in such a precarious environment.
8. Prep Your Property
You want to ensure that any shingles or nails that miss the dumpster, or other disposal method you’re using, don’t cause damage to your property. Place plywood over your air conditioner (with the unit turned off) and against any windows near the bin. Lay tarps over shrubs or other landscaping elements around the perimeter of your house. Set up your ladders in the area where they are the most stable and the least likely to be bumped by anyone passing by.
Finally, set up roof jacks, which are steel anchors that fasten to your roof and hold planks to walk on for safety. Space them no more than four feet apart and drive nails through the roof sheathing into a rafter. Use at least three nails per jack. When the jacks are secured, add in plywood boards. This forms a barrier to keep removed shingles from sliding off the roof, in addition to being a safety measure.
Another important part of roof prep is taking into account the other ways the shingle removal will impact your life at home.

We share common concerns to be aware of and preventative measures to be taken with all clients before starting work. Some of the items to be prepared for include: various levels of noise throughout the duration of the project, protecting breakable items from the vibration of construction, putting porch/patio furniture and your gas grill away from the house or in the garage, moving your car away from the driveway, and protecting any valuables stored in the attic with a tarp in case particle debris comes in through wood slots.
Chris Spacek | West Side Roofing Co.
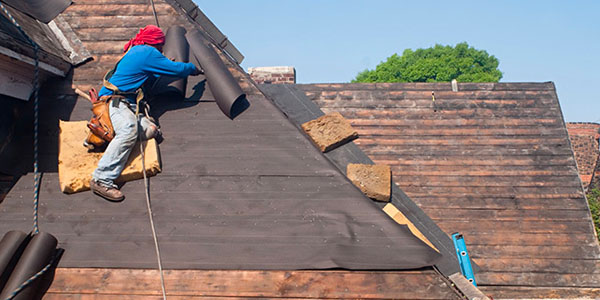
Phase 2: A Step-By-Step Guide to Removing Shingles
9. Start Tearing Off the Roof Shingles
Start at the peak of the section of your roof farthest from your dumpster or other disposal method. Work your shovel or fork under the ridge caps – the shingles at the peak of your roof – and pry them loose. Allow them to slide down to the jacks.
Once you’ve pried up the caps, you’ll be working your way down the roof, removing shingles in 2 to 3-foot sections. Use the same method you did on the caps: work your tool under the shingles plus the felt paper beneath them, pry them up and let them slide down to the jacks. For the moment, don’t worry if some nails get left behind in the roof. You’ll deal with those later.
When you’ve worked your way down to the jacks, gather the discarded shingles and toss them in the dumpster. Note: shingles are heavy. Especially if you had to remove multiple layers, even a small section’s worth of shingles will be very heavy. Do not overload yourself as you make your way to your disposal container. Take small armfuls in as many trips as necessary. You don’t want to risk stumbling and slipping as you move across the roof.
Now return to the peak and begin removing your next 2 to 3-foot section of shingles.
10. Evaluate the Flashing
Inspect the flashing – the thin pieces of material that direct water away from the home – for signs of wear. If the material is free of cracks and rust, you can reuse it with your new shingles. If any of the flashing shows signs of wear, remove and discard it.
If you are keeping your flashing, remove the nails and bend it up and back with a pry bar to remove the shingles underneath.
Note: The flashing in valleys and around chimneys and plumbing vents usually has the same lifespan as your shingles, so you’ll want to remove it. Don’t do it just yet, though. You’ll return to this step after you’ve removed all shingles.
11. Finish Removing Shingles
You’ve removed all the shingles down to the jacks on the part of the roof you’re currently working. Now it’s time to remove the jacks and take off the last remaining shingles under them. You can go about this in one of two ways.
We recommend spreading a tarp beneath the roof section you’re working on, allowing the shingles to slide off the roof onto it as you pry them up, then emptying the tarp into the dumpster once you’re done.

Do everything you can to stop debris from cascading off the roof. We put a protection board at the bottom of the roof, so when you’re tearing off the roof, shingles and debris will land on that board. Have someone there to gather debris and transfer it to the dumpster.
Chris Spacek | West Side Roofing Co.
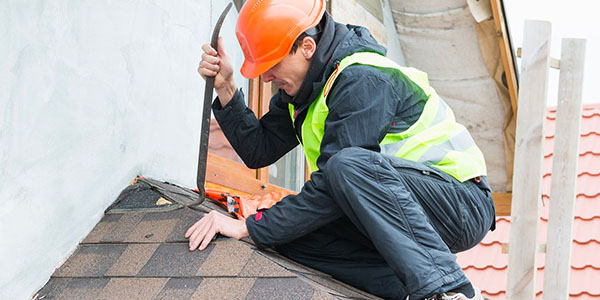
12. Remove Valley and Vent Flashing
Once you’ve removed all the shingles on one part of the roof, it’s time to remove the flashing. Starting at the top of a valley, pry the flashing loose as you pull up, working your way downward. Pry the flashing from around all vents as well.
*Repeat steps 9-12 on all other parts of the roof. When your roof is completely bare, you can move on to the next step.
Phase 3: Install Underlayment and Clean Up Roofing Debris
13. Clean the Roof
Go back over each section of the roof, pulling out any protruding nails. As you go, inspect for damaged sheathing. If you come across any rotted or otherwise damaged sections, these will need to be replaced by the roofers before new shingles go on. Next, sweep the roof clean with a push broom. Be careful, as shingle granules are slippery. Move slowly and cautiously as you sweep.
14. Install Ice & Water Barriers
Now it’s time to install ice and water barriers. To do this:
- Lay a chalk line 36 inches from the edge of the eaves. Note: if you have gutters, the barrier must cover all gutter flashing.
- Align the barrier with the chalk line and staple it every couple of feet along the top edge.
- Lift up the bottom part and remove the backing.
- Let it fall back into place. The material will immediately adhere to the roof.
- Now lift the top section (the staples will easily pull free), remove the backing and lay it down carefully to avoid wrinkles.
- Move onto the next section, overlapping seams by 6 inches.
You’ll also lay barriers in all valleys and around chimneys, skylights, and other protruding roof features.
15. Lay Felt
You’re in the home stretch now. Simply unroll your felt in sections and staple it down using lots of staples. Make sure you lay it flat, without bumps or ripples.
16. Clean Up Nails and Other Debris From Yard
Congratulations! You’ve succeeded in removing your shingles. Now, it’s just a matter of cleaning up. Check your gutters to make sure they’re not clogged with roofing debris. Remove the plywood and tarps that were protecting your property. Toss any stray shingles into the dumpster. If you rented a magnetic broom, run it systematically over your lawn to clean up any stray nails from your yard.

Make sure your roofer has a magnetic wand to “sweep” your yard and all areas surrounding the home for loose nails and screws. I had my roof replaced four years ago, and I’ll still go out in the side yard and find some old nails! This is especially important if you have children or pets in the area around the home.
Wendy Bruch | DaVinci Roofscapes


