Create a Three-Season Room With a DIY Screened-In Porch

Our Simple DIY Guide to Screen In Your Porch
There’s nothing more frustrating than enjoying a quiet meal on your porch and having to swat away flies… or worse yet, mosquitoes. And things don’t get much better when a summer rain sends you inside.
If you’re fortunate enough to already have a covered porch, it’s easy to install porch screens yourself to keep the bugs and weather at bay. When you screen in your porch, you extend the livable space of your home and lengthen the amount of time you can enjoy the outdoors.
Why Should You Install a Porch Screen?
Screens protect your porch from the elements more than an exposed patio or deck. You can use nicer furnishings, add a stereo system, a ceiling fan, or even a hot tub. Plus, adding blinds or curtains increases privacy.
Aside from the intangible value of a bug-free oasis, there is a financial benefit to screening in your porch. Design Builders Inc. reports most homeowners see as much as a 75% return on investment for a screened-in porch.
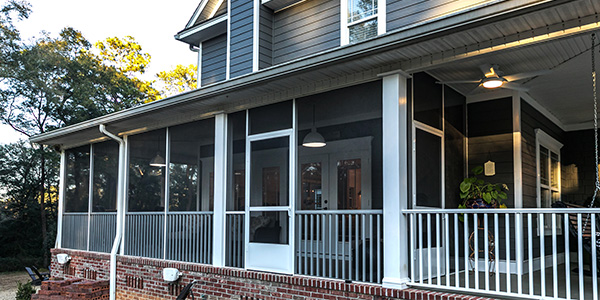
Many homebuyers want porch enclosures so they can enjoy the outdoors. Porch screens can be a big selling point when you list your home. The exact resale value depends on factors like your individual property and location.
In a recent HomeLight survey of more than 1,000 top real estate agents, 30% said a screened-in porch or patio is a feature that buyers most want to see in their market.
How Much Does It Cost to Screen In a Porch?
The average cost to screen in a porch is $3-5 per square foot of screening, plus the cost of any hardware or tools you don’t currently own.
You’ll also need to factor in the cost of the building permit. If your area requires one for this project, it can run from $100 to $300 on average. The permit price depends on the total cost of the project, the size and style of your porch, and any extra amenities.
Many counties and municipalities zone a screened porch like an addition to your home. Contact your city’s department of zoning and development for permitting information, as well as any design requirements. You should call your local homeowner association and county building inspection department as well.
Also consider the cost of a storm door, which costs about $300 on average.
Altogether, this results in an average total cost of $600 to $3,500, depending on your materials and project scope.

“You can save big bucks by building your own porch screen. If you choose to go the DIY route, you can save around $2 per square foot; plus, it can be completed in less than a day, making it accessible for DIY beginners. You should also consider putting at least 10%-25% of your overall budget aside to cover any surprise repairs or unanticipated costs.”
Caroline Feeney, Senior Managing Editor, HomeLight Inc.
How to Build a DIY Screened-In Porch in 8 Steps
Step 1: Prepare For the Project
There’s a lot to consider before you get to work on your project.
Completion Time
Screening an existing porch with a roof can take 1-2 days. So, plan for a weekend with good weather.
Building Permits
Be sure to apply for and obtain any required building permits before beginning your project. Working without a valid permit for your project can result in fines and penalties.
Design and Measurements
If you want fewer obstructions in your view, wider screen frames are the way to go. But they can be more difficult to maintain. They are also more prone to damage in high-wind situations than smaller screen frames.
Using a tape measure, take vertical and horizontal measurements of the spaces you wish to screen. This way you know how big the frames need to be and how many you’ll need to cover the space.
Doors, Floors and Steps
The door is one of the main considerations for any porch enclosure. Doors for covered porches typically swing out. Any door not installed at ground level or sitting higher than two riser heights – about 15 inches – will need a landing for safety.
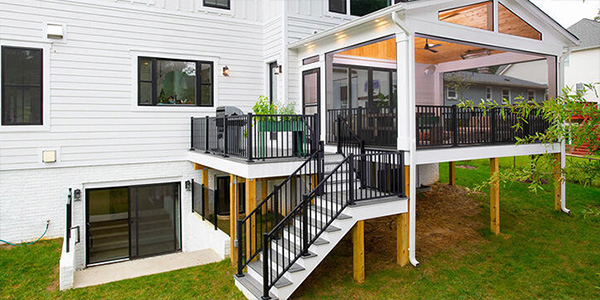
Image courtesy of Design Builders Inc.
If you’re screening in a deck, you’ll need to screen the floorboards between the joists underneath. This prevents bugs from coming up through them.
You’ll also need to remove and rebuild the existing stairs. Be sure to match the materials as closely as possible to the existing deck, which is important for aesthetics, safety and resale.

“People will definitely just throw screens on and just put an in-swing door. But it’s probably not attractive to a future owner. And it can be dangerous.”
James Moylan, President and Founder, Design Builders Inc.
Step 2: Choose Your Porch Screen Materials
Your budget and skill level will determine whether you use a screened-in porch kit, or assemble the porch screen panels yourself.
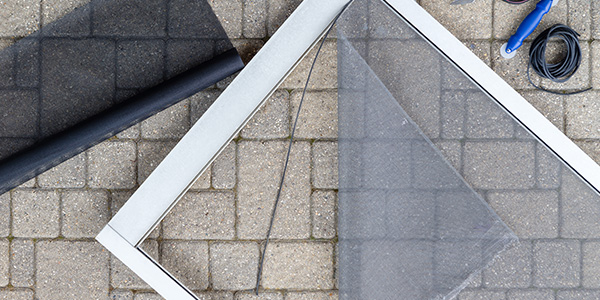
If you’re a beginner, we recommend using a screen kit. It includes everything you need for a DIY screened-in porch and is much less labor intensive. It also produces cleaner results than the traditional method of stapling a screen to wood frames.
Design Builders recommends the ScreenEze system, which they use for all of their installs. Compared to other kits, ScreenEze doesn’t require the use of spline – rubber cord that securely holds window screen in a frame. Using a kit that doesn’t need spline will save you a step.
Types of Porch Screen Fabric
Depending on the kit you use, you may have a few screen types to choose from:
Cost-Effective
The less expensive screen types are easier to work with and help keep your overall cost down. The drawback is they are easier to damage then more expensive screens. They can run anywhere from $0.25 to $0.70 per square foot on average.
- Fiberglass screen fabric is the most commonly used material. It’s soft and easy to work with and won’t rust or corrode.
- High-visibility screen fabric is a very fine weave of fiberglass. It’s easier to see through, but is more fragile.
- Aluminum screen fabric is sturdier than fiberglass, but can be more difficult to install. If uncoated, it is prone to rust and corrosion.
More Expensive
Opting for sturdier materials and added benefits usually means a higher price tag. On average, these screen types can run $1 to $25 per square foot.
- Security screen varieties are made of a heavier weave material, such as stainless steel. It’s tougher than aluminum and still allows plenty of light and fresh air through.
- Pet-resistant screen fabric is vinyl-coated polyester. This makes it thicker and more difficult to see through.
- Solar screen fabric blocks or reduces the amount of sunlight coming through. This keeps furnishings from fading and reduces heat on the porch.
Looking to create the ultimate private backyard oasis? Check out our backyard privacy ideas!
Step 3: Gather Your Tools
What you will need depends on whether you use a screened-in porch kit or make your own screen frames. Here is a list of tools you’ll likely need for both approaches.
Tools You’ll Need to Build a Three-Season Room
Miter saw | Utility knife | Pencil | Safety goggles |
Cordless drill | Roller knife | Screen Fabric | Step ladder |
Cutting snips | Straight edge | Spline | Bubble level |
Step 4: Make Sure Your Plane is Level and Plumb
You’ll need a flat plane with perfect straight lines and right angles so the porch screens sit flush on all surfaces. Otherwise, you could end up with slanted screens. Make sure the edge of the porch, the front of the posts and the roof are straight and line up with each other.
Level measures horizontal lines while plumb measures vertical. Use a bubble level to check both. You may need to add some framing or trim if the plane isn’t flat, or if your porch posts are round.

“If you have to make those adjustments to bring things into level, plumb and flush, it’s a good time to potentially upgrade the trim – maybe use pressure-treated wood, maybe use cellular PVC. And just kind of upgrade trim as you’re doing it so you can get a good attachment point for the screen systems.”
James Moylan, President and Founder, Design Builders Inc.
Step 5: Attach the Mounting Base
Mounting bases for DIY screened-in porch kits include aluminum or vinyl components. Cut these pieces to the size of the rail you’re installing it on. Be mindful that horizontal and vertical lengths may not be uniform throughout your project. Take accurate measurements for each piece of framing before cutting.
It’s best to use the miter saw, or “chop box,” when cutting mounting bases at a mitered angle. Be sure to use saw blades with as many teeth as possible for a clean cut. You can also use a hacksaw. Always wear safety goggles when you use the saw.
To begin, pre-drill pilot holes for screws used to secure the base to the opening where the porch screen will go. Check your kit’s instructions for location and recommended drill bit size for the holes. Use your straight edge and carpenter’s pencil to mark the hole locations before drilling.

Pro Tip
Don’t overtighten the screws when securing the mounting pieces. This can result in stripped or broken screws, or damaged threading in the pilot holes.
Step 6: Install the Porch Screen
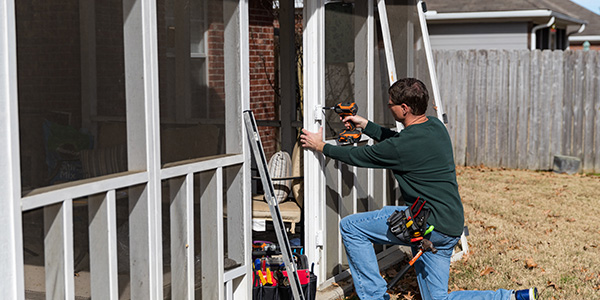
Some kits use channel pieces to hold the screen fabric in place. Measure and cut these to size. Use a rubber mallet to tap the channels into place. Have a small piece of 2×4 wood handy or some other soft material to act as a buffer so you’re not tapping directly onto the channel pieces. This helps to prevent dents and dings.
Measure your opening and cut a piece of screen fabric that’s a few inches larger. If you’re using a screened-in porch kit with a channel system, have a friend hold the fabric square against the top channel track. Fasten the screen into the track by using the roller knife to push the spline into the channel’s groove.
Keep the screen taut as you repeat the process on the sides, then finish with the bottom track. Use the utility knife to remove excess screen.
For systems like ScreenEze that use a vinyl channel cap instead of spline, square the fabric to the top of the opening. Seat the cap to the base channel at the corners with the rubber mallet. Tap the rest of the way from the center out.
Install the bottom of the screen second and repeat the process on the sides. As you work, the system stretches the screen fabric for you. Use your utility knife to remove the excess fabric.
Step 7: Place the Cap Strips
Some kits include cap strips that create a clean, finished look by concealing where the screen is attached to base pieces. Use a rubber mallet to safely tap them into place. If needed, use snips to trim them to size.
Step 8: Install a Storm Door
Select a screen door that matches the trim of your newly screened-in porch. We recommend installing a storm door, which includes glass windows that can be replaced by screen panels. Should you decide to upgrade your porch with windows down the road, having a storm door will provide the best protection from the elements.
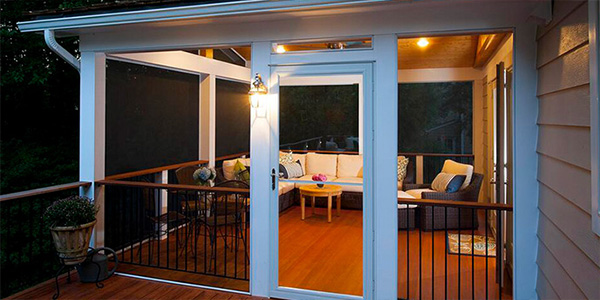
Image courtesy of Design Builders Inc.
When To Call a Pro
If you have to frame a porch for screening or installing the door, or if you need to tear down and rebuild your stairs, it might be more beneficial to hire a contractor. Just adding trim around porch posts can be a pain for a beginner.
And if you want to go all out with your screened-in porch with retractable or motorized screens or a ceiling fan, you’ll definitely want to call in a professional. Running electric out to your porch requires a licensed electrician to do it right, so you never want to try it yourself. Given the expense of powered screens, it’s not worth trying to do it yourself if you’re not used to it.

